Create a Red or Cyan Effect Out of an Image in Photoshop

Would like to create images really show up? Whereas stereoscopic special effects similar to Cyan/Red 3D are frequently shaped with fancy photography activities, I’ll be produce with simple deception image editing. Jump right on in and observe how easy it is able to be, by way of an easy version for Photoshop beginners, and another second element for users that want to give image some more get-up-and-go.
Create a Red or Cyan Effect Out of an Image in Photoshop
The practical term for a 3D image is an Anaglyph, which are generally designed by photographing a subject from two separate amenities points and mingling the images. Today we resolve the same effect by digging throughout our image canals. Open up and doing a praiseworthy image.
To make this effect we need RGB Color Mode and here we can choose any kind of image. So if we start in Indexed Color, CMYK or in Grayscale, Here we have to convert to RGB through going to Image – Mode – RGB Color into the Photoshop. The method is apposite for more than a few image editors that lets you clutter just about in channels, approximating Photoshop or GIMP. Photoshop fundamentals and Paint.NET act not allow like this sort of image editing out of the box.
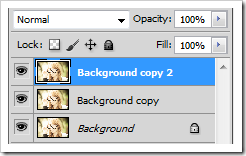
Initiate editing our image in making multiple copies of our photograph. The easiest conduct to do this is by right click “Background Layer” and selection “Duplicate Layer”. By way of two copies prepared, select the uppermost one, jump to the canals panel. It can be show by going to Window – Channels.
After reached the canals panel, pick the Red channel as shown above right.
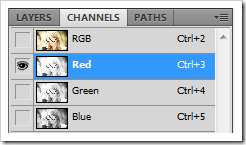
Here compress ctrl+a just to choose the entire canvas. Our secluded Red channel will appear like an unfinished grayscale version of the image, so if your photo looks like the combination of gray and over white, you are in right way.
For select Move Tool you have to press v where GIMP shortcut key “M” and move red canal over to the left.
While moving the channel, we have made sure that our “background” color is black. We can put it to black by clicking the background from the color options.
GIMP users Tool similar to the Photoshop.
Ctrl+2 will back to you RGB in Photoshop CS3. For the case of others version go to layers panel and take a new layer. You have to decide to bring to a halt at this point, now it is the halfway decent 3D effect. After all it takes one step further, and adds some depth in our image.
And should have collect quite a few copies of original photo layer; subsequently let’s homecoming to the uppermost layer inside which we fashioned our 3D effect.
Generate a mask through choosing the layer and snapping to the bottom of the layers panel. Into GIMP simply right click on layer and prefer “Add Layer Mask,” then selecting “White for Full Opacity.”
And Grab the brush tool then a soft round brush to paint elsewhere the areas you want shrouded out of this uppermost layer. Our ambition is to come back part of image to the original manifestation of the photo.
The background is shrouded absent of the layer through the 3d effect, without 3d effect reverting it to the copy below.
With the 3D effect layer masked off, we can carefully jump to a lower layer for several additional editing. Just jump to the channels panel and choose the Red channel once more.
This is in all probability looking very recognizable. Press again Ctrl+a to select the entire canvas again, for effect to the background add slightly different.
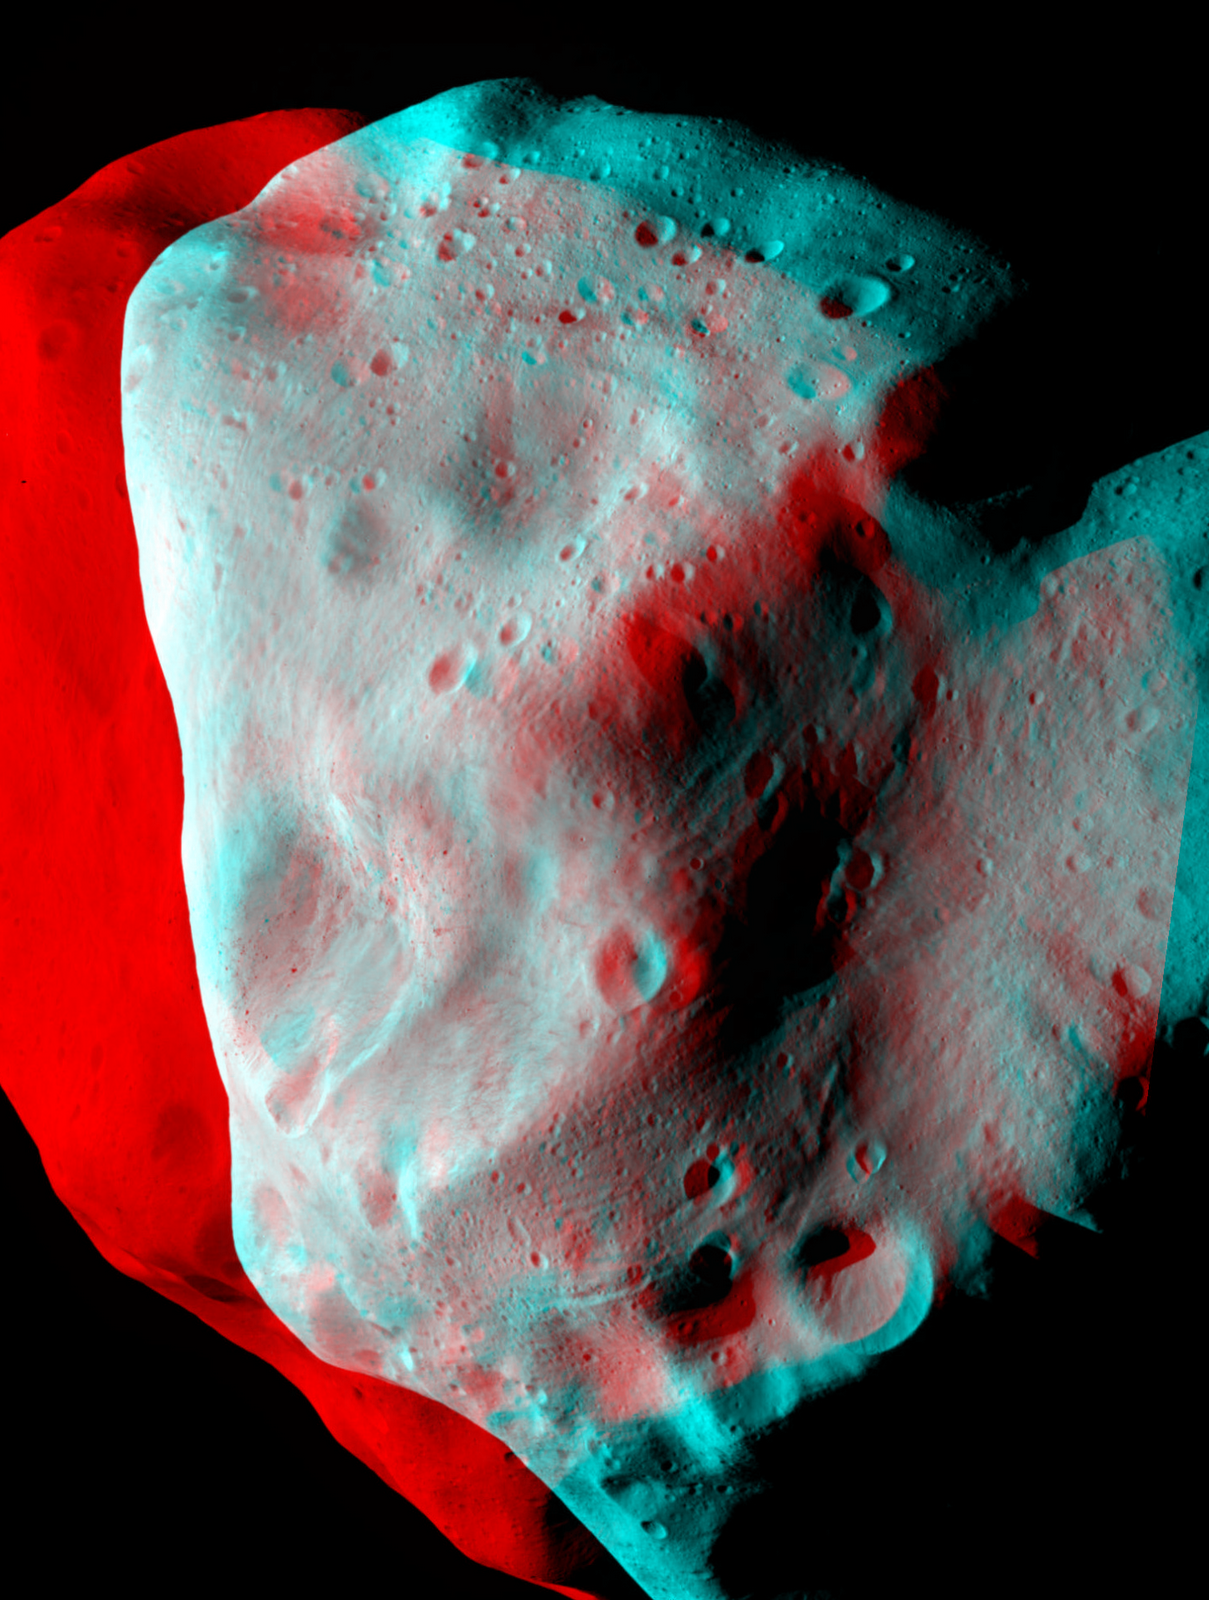
Here to add Red/Cyan 3D effect is done, by way of our 3D effect applied discretely to the foreground and background.
The final image looks like below

