Mastering Motion Blur Photography: Art of Capturing Motion with Intent
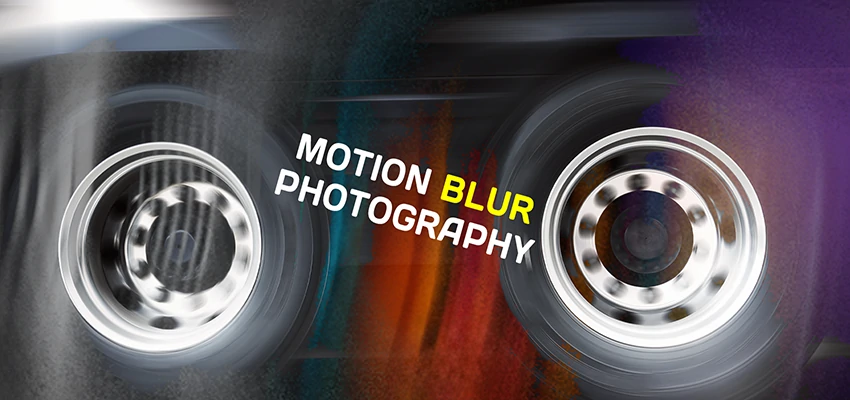
Ever seen a photo where lights streak through a city street or water flows like silk? That’s motion blur — and it’s not a mistake. It’s a creative way to show movement in a still photo. Instead of freezing a moment, motion blur adds energy and emotion. It makes your pictures feel alive. Motion blur photography is within reach of anyone, not just professionals.
By using the right settings and exercising some patience, learning it is possible. You can take photos of speeding cars, flowing waterfalls, or people in bustling streets. With motion blur, you can convey a more detailed story.
Well! Let’s capture motion blur like a pro. Master camera settings and techniques to turn ordinary movement into art.
What is Motion Blur and How it Occurs?
Motion blur transforms a moving subject into a dynamic representation of motion. It boldly conveys speed and direction, creating a sense of continuous action. Instead of freezing the moment, it sweeps powerfully across the frame.
The outcome is a vivid canvas bursting with energy and vitality. Motion blur dances into existence when the camera’s shutter lingers a heartbeat too long.
This playful technique transforms images into a kinetic masterpiece, where moving subjects weave trails of color, capturing the essence of action and excitement.
Artists deliberately choose to add motion blur to their visuals, creating an extra layer of impact. In images of racing cars, flowing waterfalls, or sparkling city lights at night, motion blur demands attention.
This effect conveys a powerful message. A stationary car embodies calmness, while a blurred image radiates speed.
Camera Settings for Capturing Motion Blur
Right motion blur starts with camera settings. You need to understand how shutter speed, aperture, and ISO work together.
1. Slow Down the Shutter Speed
Shutter speed is the most important setting for motion blur. A fast shutter freezes movement. A slow shutter shows motion.
- For light trails or moving cars: try 1/10 sec to several seconds.
- 5 sec to 2 sec works well for flowing water.
- For walking people: around 1/15 sec to 1/30 sec is a good starting point.
2. Use Manual or Shutter Priority Mode
Take control of your photography by switching to Manual (M) or Shutter Priority (S/Tv) mode.
- In Manual mode, you’re in the driver’s seat, controlling shutter speed, aperture, and ISO.
- Choose Shutter Priority, and you take control of the shutter speed while the camera handles the rest. Perfect for budding photographers, this mode eases the learning curve.
3. Adjust ISO and Aperture
Capture more light with a slow shutter to achieve a perfect balance. To make this work, try setting your ISO to 100 or 200. This helps reduce brightness and keeps noise under control. Also, go for a smaller aperture – something between f/8 and f/16.
4. Use Exposure Compensation (If Needed)
Adjust the exposure compensation to either brighten or darken your image. This simple adjustment is particularly effective in semi-automatic modes, enabling your creativity to thrive.
5. Turn on Image Stabilization (for Handheld Shots)
You can still get creative shots without a tripod. Built-in stabilization features in cameras and lenses help reduce blur and camera shake.
Best Subjects for Motion Blur Photography
Motion blur adds energy to everyday scenes. You don’t need exotic locations. With the right subject, a normal setting can become magical. Here are the best subjects to practice with and how to shoot them.
Flowing Water

Rivers, waterfalls, and ocean waves create beautiful blur. Slow your shutter to turn water into a smooth image. Use speeds between half a second and five seconds. Shoot at dawn or on overcast days to avoid harsh light. On sunny days, try an ND filter.
City Traffic and Light Trails

City streets sparkle at night. Cars create light trails. Use a tripod to capture this. Lower the ISO and set the shutter speed to 5-30 seconds to enhance the trails. Look for busy areas like overpasses and intersections.
People in Motion

Capturing people walking, biking, or dancing adds story and emotion to your shots. Use a tripod and set your shutter speed to 1/15 to 1/30 sec. This keeps the background sharp while blurring the people. You can also pan with a moving person. It’s great for markets, stations, or busy public spaces.
Amusement Parks or Fairs

Carnival rides spin and twirl in a colorful display. Ferris wheels and swings blur as they move. At twilight, bright lights create a photo opportunity. Use a tripod and 2-10 second shutter speeds to capture circular patterns. Experiment with angles and have fun!
Star Trails and Night Skies

To capture advanced motion blur, try photographing the slow movement of stars at night. This needs long exposures, often up to 30 minutes or more. Use a sturdy tripod and a remote shutter release. Set your focus to infinity. Find a very dark spot, far from city lights. You’ll get a stunning swirl of stars that shows Earth’s rotation.
Moving Animals or Pets

Whether you’re panning with a sprinting dog or freezing a bird in flight, practice is your trusted companion. These dynamic images often feature a crisp subject, set against a swirling blur or vice versa. Opt for a medium shutter speed, and unleash your camera in burst mode. This approach boosts your odds of nabbing that perfect moment where art meets action.
Techniques to Capture Stunning Motion Blur
Create dynamic images with motion blur. Explore popular techniques with a simple setup.
1. Panning
Track your moving subject with a seamless camera sweep. For that striking look—where your subject pops against a dreamy blurred backdrop—tweak your shutter speed to 1/30 or 1/60 sec. Sync it with your subject’s rhythm to capture every motion elegantly.
How to do it:
- Select a subject speeding along—be it a car, bike, or runner.
- Stay planted and turn your upper body to stay in sync.
- Snap the shot as you twist alongside them.
- Activate continuous shooting mode to elevate your odds of capturing perfection.
2. Long Exposure
Long exposure photography combines patience and precision. It captures motion, turning city scenes into masterpieces. Every shot tells a story of movement.
How to do it:
- Position your camera on a tripod for stability.
- Use a shutter speed of 1-30 seconds for stunning visuals.
- Keep a low ISO and narrow aperture (f/11 or f/16) for detail.
- Use a remote shutter or timer to avoid shake and get sharp images.
3. Zoom Blur
This whimsical technique beckons you to dance with your lens. By zooming in or out, while the shutter remains open, the magic unfolds. What’s the outcome? A mesmerizing blur that captivates the viewer’s eye, guiding their gaze straight to the core of the scene.
How to do it:
- Mount a zoom lens on a tripod.
- Set the shutter speed to between 1 and 2 seconds.
- As the shutter is open, smoothly twist the zoom ring in or out.
- Experiment with different speeds and directions to achieve unique effects.
4. Subject Blur with a Sharp Background
This technique freezes the background in time while the subject dances on. Picture a person gliding along a serene street or a train whizzing past a tranquil station. It’s perfect for capturing life’s motion against a tapestry of stillness.
How to do it:
- Use a tripod to keep your camera stable.
- Set a slow shutter speed (1/10 to 1/30 sec).
- Focus on the background.
- Let the moving subject blur naturally during the shot.
5. Sharp Subject with Blurred Background (Using Flash)
This is a tricky but exciting technique. You let the motion blur naturally — then use flash to “freeze” your subject. It creates a dreamy effect where your subject is sharp, but the background is in motion.
How to do it:
- Adjust your camera for rear curtain sync flash—it pops at exposure’s end.
- Select a slow shutter speed, anywhere from 1/10 to a full second.
- Just as the shutter closes, the flash bursts, capturing your subject in pristine clarity.
- The background blurs, adding a dreamy effect.
Composition Tips for Motion Blur Shots
Capturing motion blur depends on both camera settings and strong composition. Good framing and structure make the blur effect more powerful.
Use Leading Lines to Guide the Eye
Leading lines beckon the viewer, guiding eyes to the heart of your scene. Streets, fences, train tracks, and flowing water act as nature’s navigators. When you weave in motion blur, these lines amplify depth and tell a richer story in your photograph.
Think About the Direction of Movement
Always leave space in the direction your subject is moving. If a car or runner is moving left to right, don’t frame them too close to the right edge. Giving space in front of the subject adds balance and gives the motion somewhere to “go” in the frame.
Follow the Rule of Thirds
The rule of thirds helps make your photo more dynamic. First, divide your frame into a 3×3 grid. Then, place your moving subject or the most active part along one of the lines or intersections. This keeps your shot balanced and pleasing to the eye.
Play with Foreground and Background Elements
Introduce a sharp object in the foreground or background to enhance motion blur. Picture this: a lively crowd blurred beside a steady bench, or a cascading waterfall softened next to a crisp tree. The dance of blur and clarity magnifies your photo’s visual punch.
Leave Room for Negative Space
Don’t fret about filling every inch of your frame. Embrace negative space—the serene, less crowded areas of your photo. This emptiness can amplify the motion blur, creating arresting imagery. Picture a solitary cyclist gliding along a tranquil street or vibrant light trails dancing across a wide-open highway. Such moments can leave a lasting impact.
Use Reflections for Extra Depth
When shooting at night or by shimmering waters, seek reflections. Light trails dance and blurred movements ripple in puddles or windows, bringing depth to your composition. This effortless technique transforms a good photo into a stunning masterpiece.
Frame Your Shot with Still Elements
Frame your scene using buildings, trees, arches, or even windows to create a border around your motion blur subject. This creates context and helps direct attention to the movement happening inside the frame.
Editing Motion Blur Photos for Impact
Editing motion blur photos is just as important as capturing them. A good edit can take your photo from “nice” to “wow.” The goal isn’t to fake the blur — it’s to enhance what’s already there and bring out the mood you intended.
Start with Basic Adjustments
Master the basics: nailing exposure, contrast, highlights, shadows, and white balance is essential. Use editing software to conquer motion blur, uncovering hidden details. Create depth in your images by precision-crafting contrast and shadows.
Enhance the Colors and Tones
Motion blur shots have dreamy lines and glowing light. Boost vibrancy for popping colors, especially in light trails, sunsets, and street scenes. For moodier edits, lower saturation and try cooler tones or split toning.
Sharpen Selectively
Sharpen parts of a blurry photo that should be still. In a panning shot, sharpen the semi-sharp subject, not the blurred background. Use tools like the adjustment brush or mask to apply sharpening only to the subject, creating dynamic contrast.
Use Local Adjustments for Drama
Local adjustments are your magic brushes for directing the viewer’s gaze. Employ radial filters, gradients, or masks to shine the spotlight on your subject. Meanwhile, darkening distracting areas enhances the overall composition.
Remove Distractions
Sometimes, a stray light or random object can ruin an otherwise smooth shot. Use the clone or healing tool to clean up unwanted elements. It’s especially useful when editing long exposure city shots where someone walked into the frame halfway through your shot.
Add or Simulate Motion Blur (If Needed)
If your original shot didn’t capture quite enough motion, or you want to exaggerate the effect, software like Photoshop can help. Use tools like Path Blur or Motion Blur filters to add artificial streaks. Just be subtle — you don’t want it to look fake. This works well for artistic edits or when the natural blur needs a boost.
Crop with Purpose
Sometimes a tighter crop makes a motion shot more powerful. It can help you remove dead space or bring more attention to the blur. Just keep the story intact. Leave enough room to show direction, especially with subjects in motion.
To Conclude
Motion blur photography captures time and energy in one stunning image. It turns light trails into sparkling cityscapes. It transforms waterfalls into flowing silk and shows runners in graceful motion.
Mastery awaits, just a heartbeat away with practice, patience, and precision. Embrace the journey! Start small, unleash your creativity, and dance boldly around the rules. Each misstep crafts a lesson in wisdom.
Grab your camera and start an exciting adventure. Explore movement and capture the world in action. You’ll be amazed by the magic you create!