How to create woodcut carving effect in Photoshop

In this tutorial, we are gonna be talking about how to create a carving or engraving effect on a photo in photoshop. This effect is used mostly in logo design or by the designers of the engraving shops to simulate the final result of the project they are working on. Apart from that, this effect can be used to create 3D designs on furniture, ceramics and show pieces that need engraving effect. Industries take advantage of this technique to simulate the design of their projects.
But this is also fun to use for designing your personal project, designing wallpapers and so on. Here is a step by step guide on how you can create and apply this effect on a photo.
- Select and open a wooden texture image as your background on photoshop. Open your subject image as a layer on top of your background. Press Ctrl + T to activate the transform tool then adjust it as you see fit.

- Now you will need to remove the color from the image. To do that, press Ctrl+Shift+U or go to Image > Adjustment > Desaturate and make two duplicate copies of the layer.

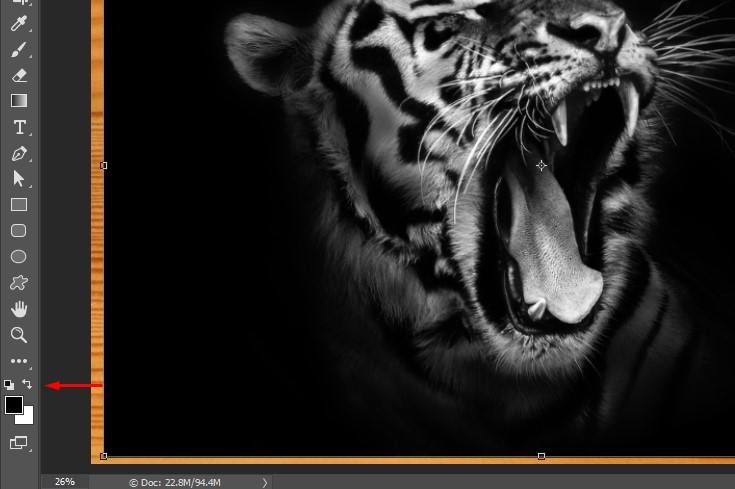
- Make sure your foreground color is set to Black. Because we need all the white area to engrave. We can not do that with the white as a foreground color. Click the toggle icon to change between background and foreground color or you can just Press X.

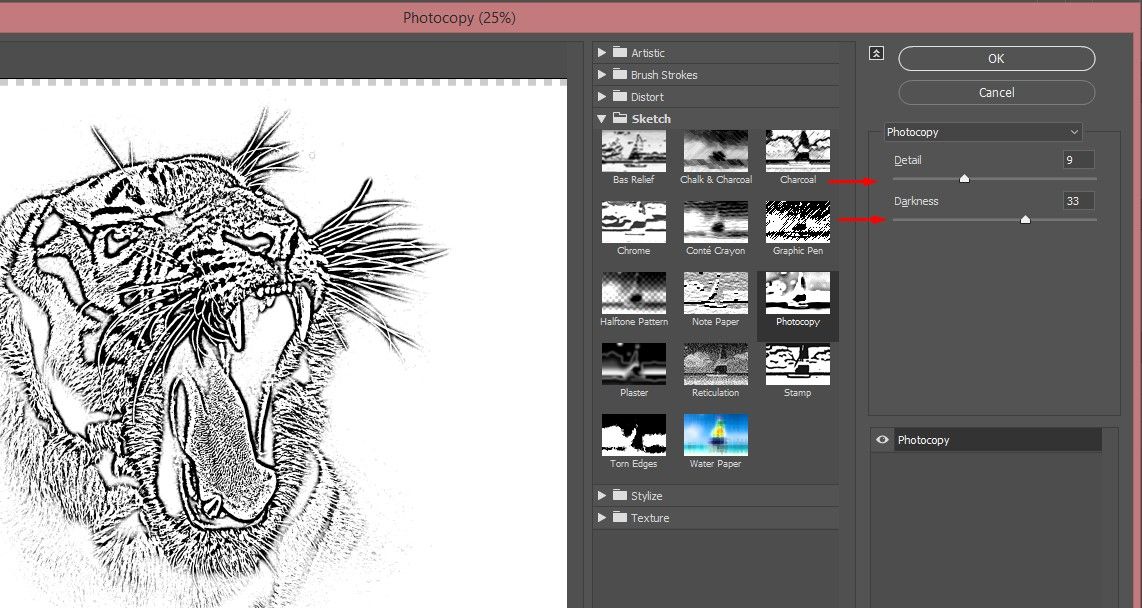
- Select the topmost layer and go to Filter > Filter Gallery > Photocopy.

- On the right sidebar, you will see the Detail and Darkness Set those all the way up to the maximum. Click Ok.

- Now select the second layer from the top and do the same go to Filter > Filter Gallery > Photocopy. On the right sidebar set the Detail and Darkness value to an optimum level such that the details around the edges and feature inside the face is maximum. Depending on your image and the resolution the value may vary.

- Again select the topmost layer and click on add vector mask button and select the mask.

- Select brush tool from the left toolbar or press Adjust the brush size.

- Now start painting around the edges to reveal the details that are underneath. Make sure you have black selected as your foreground color.

- Go to Layer > Merge Down or press Ctrl + E to merge with the underneath layer.

- Select the Channel option from the right sidebar and select the Load channel as selection button. It will automatically select the visible color.

- Go back to the Layers panel, make a new layer on top of the existing layer and turn off the existing layer’s visibility.

- Toggle the background color to black.

- Select the new layer and press Ctrl + Delete to delete the selection. Since we set our background color to black, it will fill the selection with Black color.
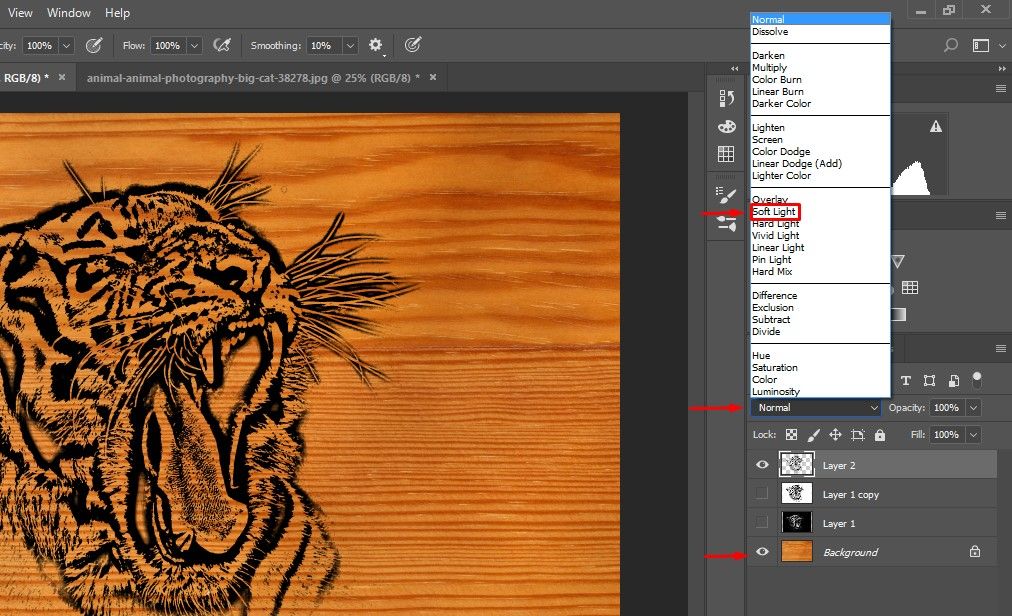
- Set the background image visible and set the blend mode from normal to soft light.

- Make another copy of the topmost layer to strengthen the effect and set the opacity lower for a balanced look.

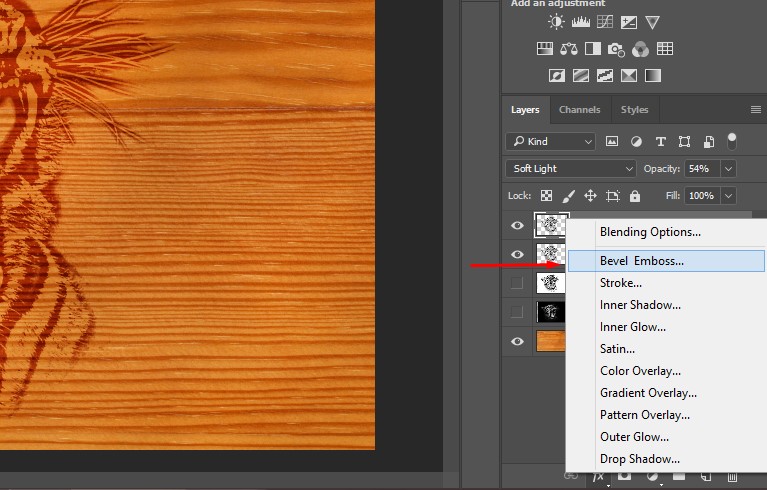
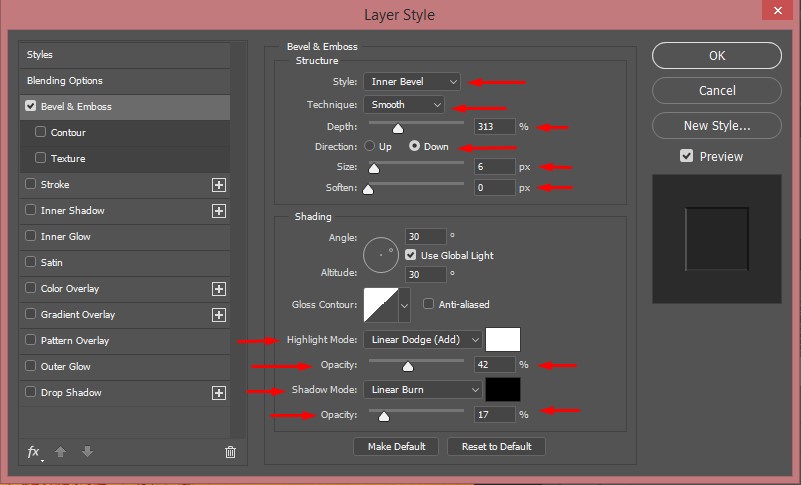
- While the new layer is selected go to the fx menu and select Bevel Emboss.

- A new layer style panel will show up. Make sure in the structure section style is set to Inner Bevel and technique is set to smooth. Set the depth around 300, Direction Down, Size around 6 pixels and Soften to 0 pixel. In the Shading section set the Highlight Mode to Linear Dodge (add). Set the opacity to 42% or somewhat close to that. Set the Shadow Mode to Linear burn and opacity to 17%. Click ok to finalize the effect.


The Final Image

These settings will vary depending on your selected photo and its resolution, so play with a different value to get a suitable result that you want.
From bulk discounts to compact packages, we offer various benefits to our customers. Here at Clipping Path India (CPI), we offer the best graphic designing solutions. If you are a designer and want to create engraving or carving effect on your products then we can help you reduce all the post-processing burden and save you some of your valuable time. When it comes to creative graphic designing, retouching and color correction, you have our utmost dedication and promises. Promises to bring you the best services in this sector. Here is a list of advantages of choosing us over others, but this is by no means is limited to the following.
- An experienced team of 200+ professionals for fashion apparels & accessory products
- We add or remove watermarks and are adept at adjusting brightness and reducing noise.
- We ensure complete data security and confidentiality of your pictures.
- Quick turnaround time
- Latest Cutting edge technology
- Highly experienced and skilled professionals
- 24/7 customer support and assistance
- Competitive rates
- Proven methodologies to deliver quality services
- High volume discount
- Rush delivery service
- We produce 5000 image edits per day
- Simplified and competitive pricing based on work volume
Clipping Path India (CPI) has been providing best in class bulk photo editing services for the past 30 years. Throughout the experiences, we have learned, what our clients actually want in their finished product. We have specialized in online based marketing platforms and eCommerce. So we are familiar with the rules and regulations that those platforms need. With a perfect blend of experience, skills, dedication, and punctuality, we offer a wide range of image editing services which can assure you the perfect quality finished work. We have served more than 10,000 clients at both SME and Corporate level. Many new customers also turn to us for reliable image manipulation services. You don’t have to believe our words, try us and hit the Free Trial button. If you are familiar and already convinced with our services then send us a Quote Request for our latest offerings.

