11 Top Photoshop Tools For Beginners

Photoshop is a professional image editing and manipulating program that comes with several powerful tools that can be used to create stunning images. But for a beginner, it can seem to be overwhelming to get a good grasp of these tools.
Here we are going to provide the basics of the 11 top photoshop tools for beginners which you will need to start editing in Photoshop. But you will still need these tools when you become an advanced user of Photoshop.
You may also read- Cool Photoshop Ideas.
1. The Move Tool

The move tool is one of the most simple but useful tools in Photoshop. When it comes to moving or dragging an object in Photoshop, this tool is inevitable. You can move texts, layers, and selections as you like. This tool can also be used to drag an element from one Photoshop document to another. It’s a simple drag-and-drop process.
To move an element, select the intended layer from the layers panel. Then, either select the move tool from the toolbar or press V to use the keyboard shortcut. Once the move tool is selected, click and drag on the object you want to move as per your wish. The arrow keys on the keyboard can also be used to move the elements.
2. The Crop Tool
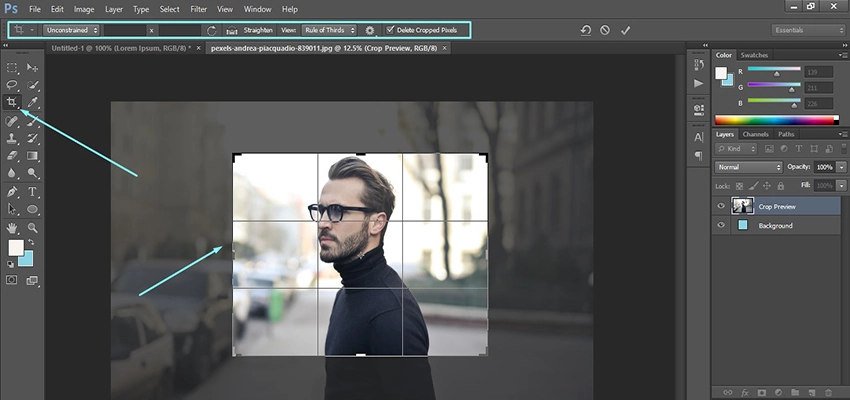
The crop tool is another tool that is used most frequently in Photoshop. It is used to select an area of the image and remove the other parts of the image which might be unwanted or unnecessary to you.
The crop tool reduces the dimensions of the image, however, it is not the same as resizing an image. Resizing alters the dimension of the entire photo and the aspect ratio, but cropping does not change the image content at all within the selected area.
To crop an image, select the crop tool from the toolbox. The crop dimension will appear automatically on your image. You can drag on the edges to enlarge or reduce the crop area.
You can also use a specific aspect ratio from the top menu bar, this will allow you to keep your images in the desired dimension.
3. The Brush Tool

The Brush Tool is Photoshop’s default painting tool. It can be used, like a traditional paintbrush, to draw shapes by applying color using strokes in the workspace. There are several brush styles to choose from, and more brush styles can be added. The Brush Tool can be selected from the toolbar or you can use the keyboard shortcut by pressing B.
The Brush Tool has several options such as Blending Mode, Hardness, Flow, and Opacity. Once selected, the opacity and flow of the brush can be changed from the top options bar. You can also increase or decrease the brush size from the top bar or by using keyboard shortcuts, [ to decrease and ] to increase. To draw a shape or an element, you just simply need to drag the brush on your canvas. You can also use the Blending Mode to create unique effects on the elements.
4. The Text Tool
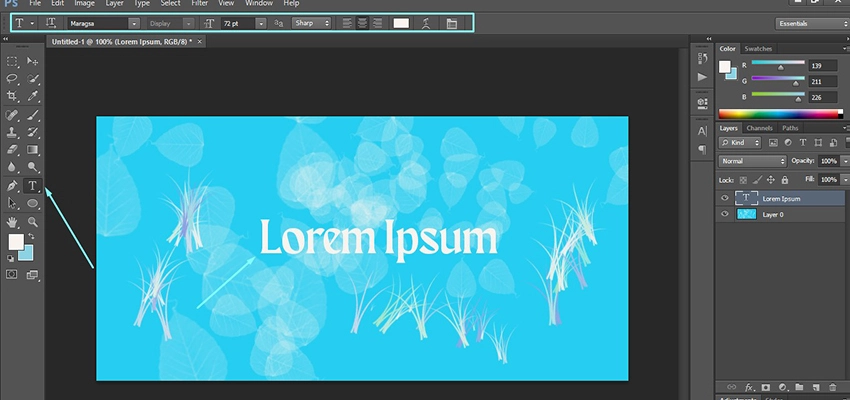
The Text Tool is another powerful but simple tool in Photoshop with which you can add text to your images. The text fonts, colors, and sizes can be changed from the top options bar. You can select the text tool from the toolbar or use the keyboard shortcut T. Once selected, choose your desired font type and size, and then click and drag on your canvas to create a textbox. Within the textbox, you can type your desired texts. A new layer will be created, and you can rename the layer to avoid any confusion.
This text layer can also be manipulated to create unique effects like other layers in Photoshop.
5. The Shape Tool

The Shape Tool allows you to quickly create geometric shapes on your images such as circles, triangles, lines, or polygons. To create a shape, select the shape tool from the toolbar or press U on your keyboard. Right-clicking on the shape tool will allow you to choose from different shapes.
After selecting the tool, click and drag on your image to create the shape of your desired size. Holding the Shift button on the keyboard will create a uniform shape. You can also change the number of sides on a polygon from the options bar on top. The shape will be added to a new layer which you can rename and manipulate for your convenience.
You may also read: How to boost your creativity by learning Photoshop?
6. The Pen Tool
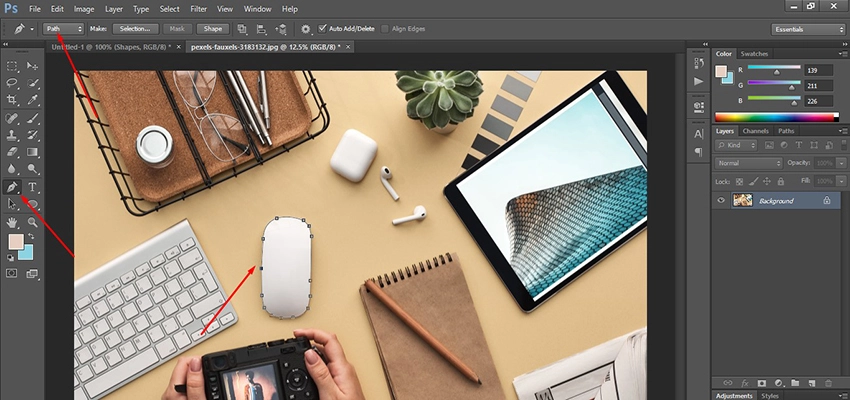
The Pen Tool is used to create vector shapes and custom selections in Photoshop. You can create a path around an object with the pen tool to cut it out from the background or edit the object in other programs.
You can select the Pen Tool from the toolbar or by pressing P on the keyboard. Once selected, you can choose whether you are going to create a Path or a Shape from the top options bar. When you click on the image or object, you create anchor points on the image. Click and drag along the edges of the object to create a curved line. Make sure you click on the first anchor point to close a selection. To define the selection, right-click and choose “Make Selection’.
7. The Quick Selection Tool
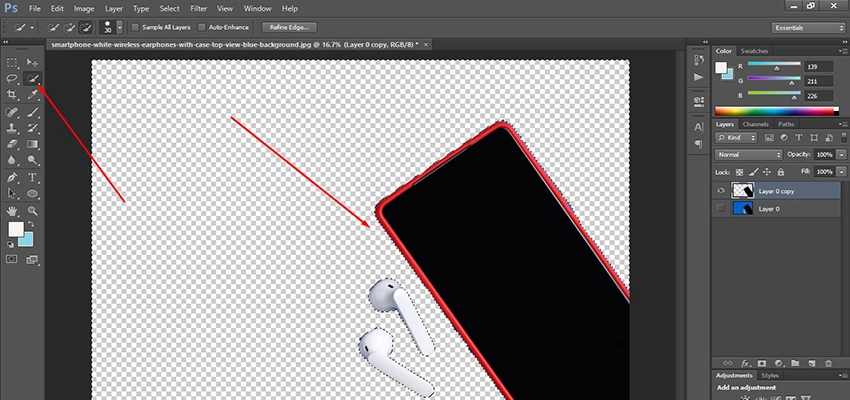
The Quick Selection Tool in Photoshop is a great choice if you want to quickly make a selection around a simple object. It selects pixels based on similar color, tone, and texture. To use it, you simply need to paint over the objects you need to select. This makes it very efficient in detecting the edges of a simple object.
To activate the Quick Selection Tool, select it from the toolbar or press W on the keyboard. Then click and drag on the object you want to select, Photoshop will make the selection as accurate as possible.
You can select the background by going to Select > Inverse or using the shortcut Shift + Control + I (Windows) or Shift + Command + I (Mac). Create a duplicate layer, and press Delete to remove the background.
8. The Marquee Tool

If you want to select the area of a specific shape, you can use the Marquee Tool in Photoshop. To use the Marquee Tool, select it from the toolbar or press M on the keyboard. Here, we are going to remove the rectangular sky from an image. To do so, click and drag on the rectangular horizon of your image. Create a duplicate layer, and press Delete to remove the sky.
9. Layer Masks
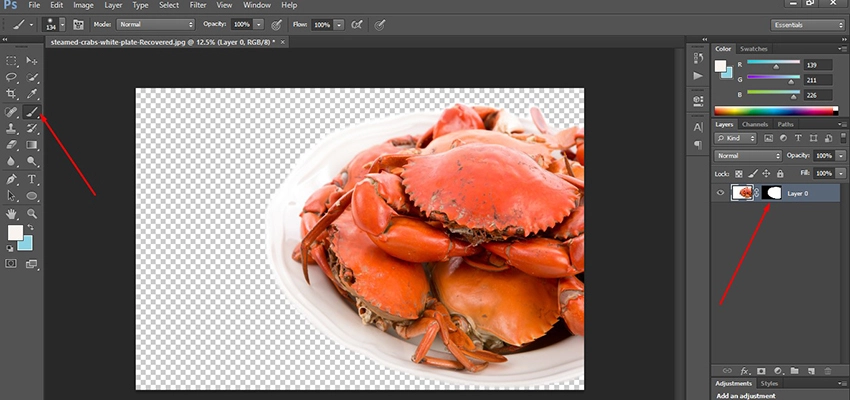
Layer masking is a powerful Photoshop tool that can be used to hide or show certain parts of an image. It controls the transparency of the layer on which it is added. In other words, layer masks allow the information from the lower layers to show up.
To add a Layer Mask, select the correct layer and click on the ‘Add a Layer Mask’ shortcut at the bottom of the Layers panel. This creates a white or black box next to the layer thumbnail.
You can then use the paintbrush tool to hide or reveal the parts of the layer. Painting white will reveal the layer while painting black will hide the layer.
10. The Transform Tool

The Free Transform tool is a handy Photoshop tool to do some quick editing on your photos or objects. You can resize, rotate, flip, warp and change the perspective of your images. To use the Transform Tool, go through Edit>Transfrom, and then select the option you want to apply to your image. For example, you can select Warp to pull and drag your image as you like.
11. Spot Healing Brush Tool

The Spot Healing Brush Tool is used to provide a lot of retouching to an image. It is very efficient in repairing and removing spots or blemishes from an image. The difference between Healing Brush Tool and Spot Healing Brush Tool is that in the latter the relevant pixels are automatically selected to replace with, whereas in the first one you have to do it yourself.
You can select the tool from the toolbar or press J on your keyboard. To remove parts of an image, select the size of the circle and click on the areas you want to remove or get fixed.
Conclusion
So, we have so far discussed the most basic yet powerful tools in Photoshop with easy-to-follow explanations to help you get started. But definitely, there is more to do with these tools, so you should try yourself and make your hands dirty with different options and utilities these tools provide. Please follow our blog to study more tutorials on Photoshop.