Cool Photoshop Ideas for Beginners: Best 21 Picks

Stepping into the vibrant world of Adobe Photoshop can be both exciting and overwhelming for beginners. With a myriad of Photoshop tools and techniques at your disposal, the potential for creativity is limitless. But where should a newcomer begin in this expansive realm of digital artistry? Worry not!
We’ve curated a list of imaginative and cool Photoshop ideas for beginners that will transform your everyday photos into captivating masterpieces. From ethereal landscapes to mesmerizing portraits, Photoshop holds the secret to elevating your visuals. If you’re eager to explore, learn, and craft stunning images, let’s get started on this creative journey together!
Basics Before Starting
Before diving deep into the world of Photoshop and its array of creative possibilities, it’s crucial to familiarize oneself with the foundational aspects. Firstly make sure your Photoshop performance is good enough and then here’s what you need to know:
Quick Rundown of Essential Tools
Photoshop boasts a vast toolbar, but as a beginner, you don’t need to master every single tool from day one. Start with the essentials:
- Move Tool (V): Easily reposition any selected image segment.
- Brush Tool (B): Used for painting and drawing directly onto the image.
- Clone Stamp (S): Allows you to duplicate parts of an image.
- Eraser Tool (E): Remove or modify features in your design.
- Lasso Tools: These come in three varieties (Lasso, Polygonal Lasso, and Magnetic Lasso) and are used for selecting parts of your image.
- Magic Wand (W): Selects portions of an image based on color similarity.
- Crop Tool (C): Resize, reshape, and Crop your image.
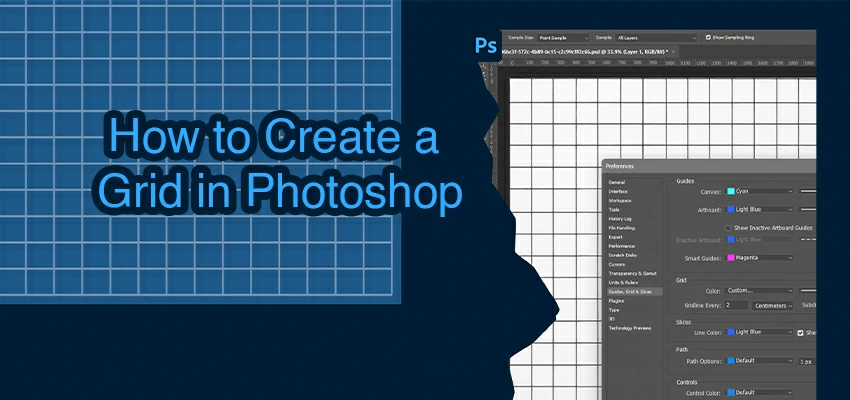
Setting Up a Canvas
The canvas is your digital workspace, the blank slate where all the magic happens. Here’s how to set it up for optimal work:
- New Document: Go to ‘File’ > ‘New’. This opens up a dialog box where you can set your canvas dimensions.
- Resolution Matters: For digital artwork or any online medium, 72 pixels/inch is standard. If you’re designing for print, aim for 300 pixels/inch to ensure clarity.
- Background Content: Decide if you want a white, colored, or transparent background.
- Orientation: Choose between ‘Portrait’ or ‘Landscape’, depending on your project’s needs.
- Mode and Bit: RGB Color mode is commonly used for images that will be displayed on screens, while CMYK is used for print. You can start with 8-bit; however, for more complex edits, consider 16-bit.
So, Ready to ignite your imagination and craft captivating visuals? Here are some cool Photoshop ideas for beginners:
1. Double Exposure Effect

Originating from the days of film photography, the double exposure effect combines two different images into a single frame. This technique was historically an accident when film would unintentionally capture two images, resulting in a surreal blend of both. In the digital era, Photoshop allows artists to recreate this magic intentionally. To achieve this effect:
- Open both images you wish to combine.
- Position one image over the other.
- Adjust the ‘Blending Mode’ (typically ‘Screen’ mode works well) of the top layer to let the bottom image show through.
- Fine-tune using masks and adjustment layers for a seamless look.
You may also read– Best Photo Frames for Photoshop.
2. Color Splash

The color splash effect offers a dramatic flair by converting a photograph into black and white while retaining or highlighting specific areas in vibrant color. This stark contrast draws the viewer’s eye directly to the colored portion, creating a memorable impact. To craft this effect:
- Convert your image to black and white using the ‘Desaturate’ option or an adjustment layer.
- With the original colored layer beneath, use a soft brush or masking technique to reveal color in your desired area.
- Adjust the vibrancy and sharpness to make the colored section pop against the monochrome backdrop.
3. Pop-out Photo Effect

The pop-out photo effect gives life to a two-dimensional image by creating an illusion that a subject is leaping or “popping out” of the frame. This 3D-like presentation can make viewers do a double-take. To achieve this:
- Insert and Open your desired image in Photoshop and duplicate the background layer.
- Carefully cut out the subject you wish to ‘pop out’ from the duplicated layer.
- Extend the frame by resizing the canvas, allowing space for the subject to ‘extend’ beyond.
- With creative use of shadows and perspective adjustments, position the cut-out subject to appear as if it’s emerging from the original frame.
4. Retro/Vintage Effect

Taking a stroll down memory lane, the retro/vintage effect transforms modern photographs to evoke nostalgia, mirroring the charm of yesteryears. The essence lies in muted color palettes, sepia tones, and a hint of grain. Here’s how:
- Apply a color adjustment layer, toning down the saturation and leaning towards warmer hues.
- Introduce a ‘Vignette’ around the edges for a time-worn appearance.
- Use the ‘Add Noise’ filter in moderation, providing that characteristic grainy touch.
- Optionally, overlay light leaks or faded textures for added authenticity.
5. Dreamy Soft Light Effect

Perfect for romantic or ethereal settings, the dreamy soft light effect bathes photographs in a gentle, diffused glow, giving subjects a magical, almost heavenly ambiance. The key lies in blending and layering. Steps include:
- Duplicate the background layer and set its blending mode to ‘Overlay’.
- Apply a Gaussian Blur (found under the ‘Filter’ menu) to the duplicated layer to the desired intensity.
- Adjust the opacity to control the strength of the glow.
- Fine-tune the outcome using adjustment layers like ‘Levels’ or ‘Curves’ for brightness and contrast enhancements.
6. Miniature World

Ever wanted to make the vast expanse of a city or landscape look like a tiny diorama? Tilt-shift photography imitation in Photoshop allows you to create the illusion of miniature scenes. Here’s how:
- Open your chosen image, preferably taken from a high vantage point.
- Apply a ‘Tilt-Shift’ blur from the ‘Blur Gallery’, adjusting the blur amount, position, and transition.
- Boost the saturation slightly to emulate the vivid colors often seen in miniature models.
7. Reflections and Mirrors

Infusing reflections adds depth and realism to scenes. Whether it’s the calm of a mirrored lake or the sharpness of a glass reflection, here’s your guide:
- Duplicate the object or scene you wish to reflect.
- Flip it vertically and position it below or adjacent to the original, depending on the reflection direction.
- Adjust opacity, add a slight Gaussian blur, and use a gradient mask to achieve the fade of a natural reflection.
- For water reflections, introducing ripple effects can enhance realism.
8. Magical Glow Effect

A touch of luminosity can bring ethereal beauty to an image. The ‘Magical Glow Effect’ gives objects an aura, making them shine with an enchanting light. This effect is especially splendid for fantasy-inspired artworks or to emphasize a specific subject.
- Begin by creating a new layer, then use a soft brush to paint around the object with the color of your desired glow.
- Adjust the blending mode of this layer to ‘Overlay’ or ‘Soft Light’.
- Dive into ‘Layer Styles’ and apply an ‘Outer Glow’, tweaking the color, spread, and size to get the right luminosity.
9. Floating Objects

Defy the laws of physics in your photos by making objects appear as if suspended in mid-air. This captivating effect can infuse images with a sense of wonder, merging the realms of reality and imagination.
- Capture your main scene and the object you want floating in separate photographs, ensuring lighting consistency.
- In Photoshop, merge these images, positioning the object in the desired ‘floating’ spot.
- Employ layer masks to seamlessly blend and erase any supporting structures or strings.
- Add shadows below the floating object, giving it depth and realism within its setting.
10. Transform Day to Night
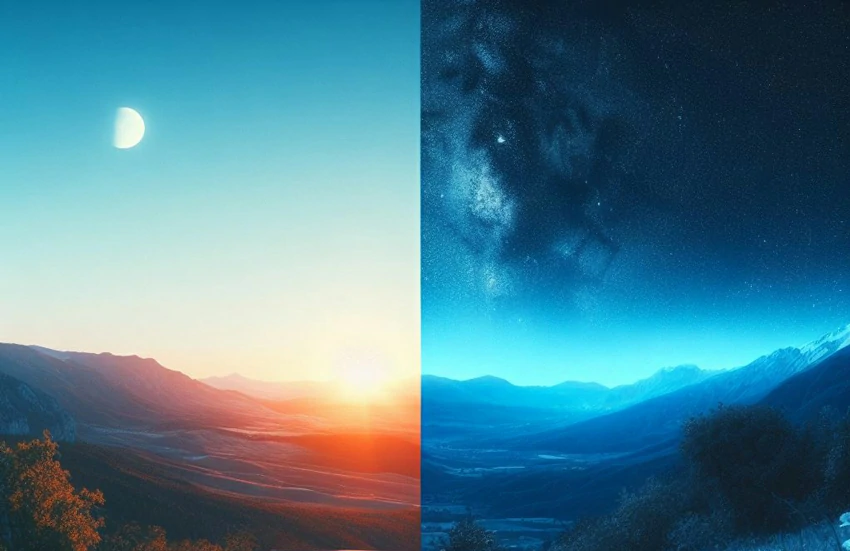
Swapping daylight’s brilliance for the mystique of twilight can entirely reshape the mood of a photo. The ‘Transform Day to Night’ effect allows you to recreate the quiet allure of nighttime, casting your scene under the soft glow of the moon and stars.
- Initiate by using the ‘Color Lookup’ adjustment layer, selecting presets like ‘Moonlight’ or ‘NightFromDay’ to darken the scene.
- Tweak the brightness and contrast settings to emulate the subdued lighting of nighttime.
- Add celestial elements like stars or the moon to elevate the night ambiance.
- Utilize the ‘Color Balance’ adjustment to infuse the characteristic cool blue tones of nighttime.
11. Adding Textures

Textures can introduce depth, character, and tactile essence to your images. Whether it’s the grungy appeal of old paper or the coarse grit of sand, blending textures can make your portraits or landscapes resonate with added dimension and emotion.
- Start by choosing an appropriate texture image; it can be anything from fabric patterns to wall cracks.
- Overlay the texture layer onto your main image in Photoshop.
- Experiment with blending modes like ‘Multiply’, ‘Overlay’, or ‘Soft Light’ to seamlessly integrate the texture.
- Adjust the opacity and use layer masks to ensure the texture complements, not overpowers the primary image.
12. Comic Book Effect
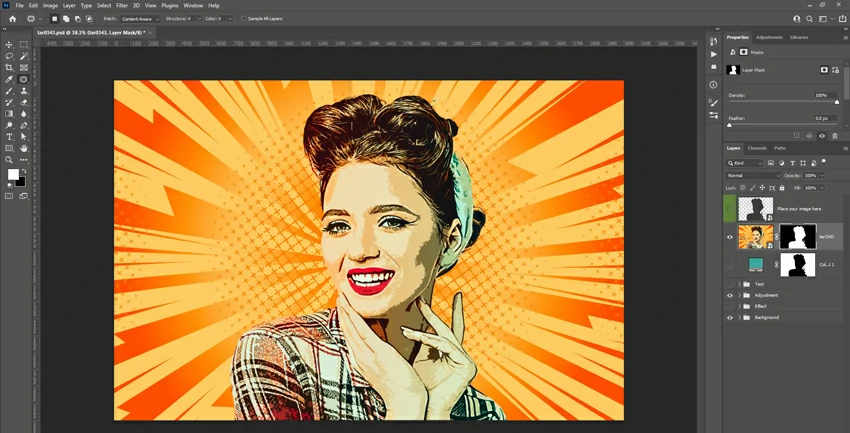
Immerse your photographs into the vibrant world of comics with this effect. The ‘Comic Book Effect’ transforms regular shots into illustrations reminiscent of classic comic panels, complete with bold outlines and dotted halftone patterns.
- Start by increasing contrast in your image for that stylized comic look.
- Apply a ‘Poster Edge’ filter to accentuate edges, giving a hand-drawn appearance.
- Introduce ‘Halftone Pattern’ from the ‘Filter’ gallery, typically choosing ‘Dot’ for that signature comic print feel.
- Fine-tune colors and saturation to achieve bold, vibrant comic-like hues.
13. Watercolor and Painting Effect

Meld the precision of photography with the fluid charm of watercolor art. This effect transforms your shots into dreamy digital paintings, mimicking the soft washes and intricate brush strokes of watercolor.
- Duplicate your image layer and apply a ‘Cutout’ filter to simplify details, simulating the flat regions of watercolor.
- On another duplicate layer, use the ‘Dry Brush’ filter to introduce brush strokes.
- Blend these layers, often using ‘Overlay’ or ‘Multiply’, depending on your image.
- For added authenticity, overlay a watercolor paper texture and experiment with various brushes to introduce or emphasize certain strokes and splatters.
14. Surreal Floating Landscape

Transport your audience to a fantastical realm where landscapes defy gravity. The ‘Surreal Floating Landscape’ effect detaches terrains from their surroundings, creating ethereal floating islands or suspended cities, reminiscent of dreamscapes or otherworldly vistas.
- Isolate the portion of the landscape (like an island or cityscape) you want to float using selection tools.
- Remove its connection from the ground or surroundings, creating a standalone floating element.
- Introduce shadows beneath the floating landscape to give a sense of depth and height.
- Enhance the surreal atmosphere by adding dreamy clouds, birds, or other elements around the floating piece.
15. Crystal Ball Effect

Enchant your images with a mystical touch by incorporating a transparent orb. The ‘Crystal Ball Effect’ plays with the unique way a glass sphere bends and refracts light, offering a captivating, inverted view of the scene within its confines.
- Introduce a high-quality image of a transparent crystal ball onto your main photo.
- Isolate and invert the portion of your scene you want inside the ball, then fit it to the ball’s shape and perspective.
- Adjust the refracted scene’s opacity and blend mode to make it appear as if it’s truly inside the glass.
- Enhance the realism by adding reflections and light refractions on the surface of the crystal ball.
16. Replace Skies

Breathe new life into a mundane image by introducing a sky filled with drama and vibrancy. The ‘Replace Skies’ effect allows you to swap out lackluster skies with ones that burst with color, clouds, or celestial wonders, instantly enhancing the mood of a photograph.
- Use selection tools to carefully select and isolate the sky in your original image.
- Import your chosen dramatic sky image and place it behind your main photo.
- Adjust the colors and lighting of the foreground to match the new sky for consistency.
- Blend the horizon line seamlessly using gradient masks or soft brushes to ensure a natural transition between the landscape and the sky.
17. Ghostly Images

Evoke intrigue and a touch of the supernatural by introducing ethereal apparitions into your photos. The ‘Ghostly Images’ effect creates transparent figures that seem to haunt the frame, adding a layer of mystery and narrative to your visuals.
- Capture or choose an image of the figure you want to turn into a ghost.
- Place this figure onto your main image, positioning it as desired.
- Reduce the opacity of the ghostly figure, allowing the background to show through, creating a transparent effect.
- Fine-tune the edges using soft brushes or layer masks to ensure the ghost blends naturally into the scene, adding any desired motion blur or light effects to enhance the spectral feel.
18. Fire and Smoke Effects

Ignite your images with dynamic fire and swirling smoke, adding drama and intensity. The ‘Fire and Smoke Effects’ allow you to imbue photos with these elemental forces, either to enhance a narrative or to elevate the aesthetics. Before diving in, ensure that if you’re capturing real flames or smoke, safety remains paramount.
- Import your fire or smoke image onto your main photo, adjusting its position and size.
- Use blending modes like ‘Screen’ or ‘Lighten’ to seamlessly merge the fire or smoke with the background.
- Adjust the hue, saturation, and brightness to ensure consistency with the surrounding light sources.
- Refine the edges and intensity using layer masks, soft brushes, and opacity adjustments.
19. Holographic Effect

Dive into the futuristic or fantasy realms by incorporating shimmering holographic elements. The ‘Holographic Effect’ makes objects gleam with multicolored, iridescent lights, reminiscent of sci-fi interfaces or magical artifacts.
- Choose or design a gradient map that captures the spectrum of holographic colors.
- Apply this gradient map to your desired object or image area.
- Adjust the blending mode to modes like ‘Overlay’, ‘Soft Light’, or ‘Hard Light’ to infuse the holographic colors while retaining the object’s details.
- Fine-tune the intensity and spread of the effect using opacity sliders and layer masks.
- To elevate the effect, introduce light flares or reflections that match the holographic tones.
20. Content-Aware Fill

In Photoshop, one of the most powerful tools for removing unwanted objects or imperfections from an image is the Content-Aware Fill. It doesn’t just erase; it analyzes the surrounding areas of the selection and intelligently fills in the space with content that matches the surrounding area, often producing seamless results.
- Navigate to Edit in the top menu and choose Content-Aware Fill.
- In the Content-Aware Fill workspace, use the tools provided to refine your initial selection if needed.
- Photoshop will generate a preview of the fill in the main window. On the right panel, adjust the settings if necessary to get the desired result.
- Once satisfied with the preview, click OK to apply the fill.
21. Neural Filters

Photoshop’s foray into integrating artificial intelligence has birthed a suite of impressive tools called ‘Neural Filters’. Powered by Adobe’s Sensei AI, these filters leverage deep learning to assist with complex edits, transforming images in ways that were previously labor-intensive or near-impossible.
- Navigate to Filter on the top menu and select Neural Filters.
- You’ll be presented with a range of filter categories, both in beta and featured.
- Select a filter, adjust the settings as desired, and watch the AI-powered preview generate in real-time.
- Once satisfied with the results, apply the changes.
Suggested Article– Adobe Photoshop vs GIMP.
To Conclude
So, it’s all about our creative and cool Photoshop ideas you can try to enhance your creativity. Each tool, effect, and technique is a brushstroke in the vast canvas of visual storytelling. And while the ideas listed here serve as a foundation, remember that they’re merely the starting point. Your imagination is the true guiding force.
As you navigate through these creative techniques, let curiosity be your compass. Mistakes, surprisingly, often lead to the most serendipitous discoveries. The magic of Photoshop lies not just in its advanced capabilities but in its ability to transform ordinary moments into extraordinary visuals.
So, continue to play, tweak, and innovate. After all, in the realm of Photoshop, creativity knows no bounds.