Airport Photo Ideas: 40+ Shots, Poses, and Angles That Actually Look Good
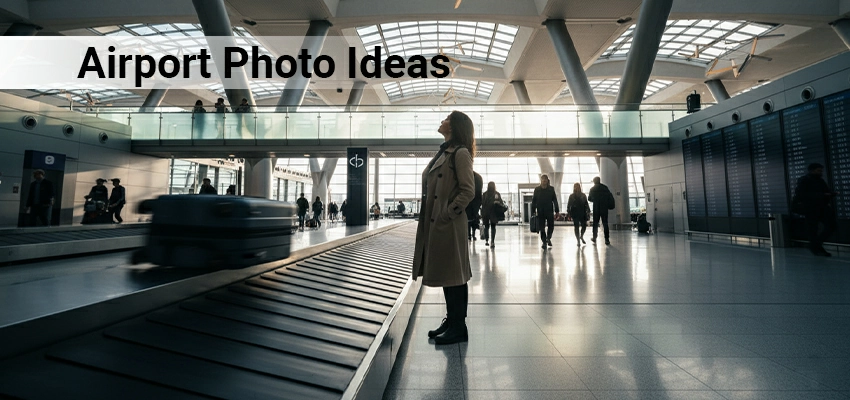
Airports are one of the easiest places to take photos that feel like a story. You have movement, big architecture, dramatic window light, signs that instantly add context, and that “I’m going somewhere” energy built in.
But here’s the problem: most airport photos look the same. Someone pulling a suitcase. Someone standing under a sign. Or, someone doing the same “passport in hand” shot from 2016.
So this post is different. Here are some practical photo ideas to capture at real airports. You’ll find pose prompts that feel natural, plus tips for clean, premium, and intentional shots.
Key Takeaways
- Airports give you built-in leading lines, symmetry, reflections, and window light, so focus on architecture first.
- The best shots often come from simple actions (such as walking, looking out the window, or checking your phone), rather than stiff poses.
- Prioritize clean backgrounds and negative space to make photos look premium and less “touristy.”
- Mix wide storytelling frames (terminal scale) with tight detail shots (signs, tags, coffee) for a complete travel narrative.
- Use silhouettes and reflections to add mood and avoid distracting crowds without overthinking it.
Before You Shoot: Quick Airport Photo Rules and Etiquette
Airports are public spaces, but they’re also sensitive spaces. Use common sense, and you’ll be fine.
A few simple guidelines:
- Don’t shoot at security checkpoints.
- Avoid close-ups of staff, security, and equipment.
- Don’t put strangers’ faces in focus unless you have permission.
- Keep your photos brief and avoid blocking walkways.
If you’re ever unsure, switch to wide shots or silhouettes. They look better anyway.
Best Times and Best Spots for Airport Photos
You don’t need to “get lucky.” You just need to know where airports naturally look good.
Best times
- Morning: cleaner light, fewer crowds, calmer vibe
- Late afternoon: warmer light near windows and gates
- Night: glossy, cinematic look with reflections and neon signage
Best spots (these always work)
- Big windows near the gates
- Long hallways and moving walkways
- Escalators and stairs
- Check-in areas with signage
- Lounge or café seating with soft light
- Glass walls with runway/plane views
Airport Photo Ideas by Different Locations
1) Suitcase roll-in shot (low angle)
Keep your camera low near knee height and walk naturally while pulling the suitcase. This angle makes the terminal appear larger, and your movement looks more intentional. It’s simple, dynamic, and doesn’t need a perfect background.
2) Under the terminal sign
Stand a little off-center under the main airport/terminal sign so it feels more editorial than posed. Let the sign be readable but not overpowering. This shot instantly says “travel day” without any extra props.
3) Stepping out of the car
Capture the moment one foot lands outside, door open, suitcase visible. It feels like the first frame of a travel film. Shoot from slightly behind or from the side for a natural vibe.
4) Reflection in the car window
Use the glass to layer your face and the terminal behind you in one frame. Reflections add depth and a premium look with almost zero effort. Keep the background clean and avoid cluttered parking views.
5) Night curb shot with headlights blur
Stand still near the curb while cars pass to create light streaks and motion. The contrast of you being sharp against moving lights looks cinematic. Works best when signage and street lights are visible.
6) Over-the-shoulder at the kiosk
Frame your hands interacting with the kiosk while your face is partly visible in the corner. This feels candid and story-driven. Keep the screen readable, but avoid capturing personal info.
7) Walking past check-in counters
Walk along the counters so they form strong leading lines behind you. The shot looks organized and “busy” in a good way. Aim for a calm expression, not a stiff pose.
8) Luggage lineup shot
Place your luggage neatly and shoot from the side for a clean, minimal composition. This works especially well with matching luggage or a tidy outfit. It’s a quick shot that looks surprisingly premium.
9) Close-up of luggage tag
Zoom into the texture and travel detail, but hide personal information. A tight crop makes it feel like a magazine insert photo. Pair it with a hand holding the handle for extra context.
10) Wide shot with a big ceiling
Step back and capture the scale of the terminal architecture. Keep yourself small in the frame to emphasize space. This is the easiest way to make an airport look “expensive.”
11) Centered hallway symmetry shot
Find a long corridor and stand centered so lines converge behind you. Symmetry makes the image feel clean and intentional. Keep your posture relaxed so it doesn’t look like a statue shot.
12) Walking away shot (the classic)
Walk away from the camera with a natural stride and slightly turned shoulders. Let the suitcase trail a bit behind, not stuck to your leg. This reads as “on the move,” not “posing.”
13) Moving walkway action shot
Stand calmly on the walkway while the background shifts around you. The motion creates energy without you overacting. Keep your hands simple: one on suitcase, one relaxed.
14) Escalator top-down shot
Shoot from above to capture repeating steps and rails as graphic patterns. A single subject in the middle looks strong and modern. This shot works great even when the terminal is crowded.
15) Look-back moment
Walk forward and turn your head slightly back as if someone called you. It feels candid and flattering when done softly. Don’t over-smile; keep it subtle.
16) Silhouette under overhead lights
Use bright ceiling lights to outline your shape while keeping your face darker. Silhouettes feel cinematic and also avoid privacy issues. This works best with strong lines and clean spacing.
17) Reflection floor shot
Use polished floors to mirror your legs, luggage, or full body. Reflections instantly add style and depth. Keep the frame tidy so the reflection looks intentional, not accidental.
18) Window silhouette with plane in frame
Stand near the window so your outline is visible while the plane sits outside. This tells a full story in one shot. Keep the plane clear but don’t fight for a perfect close-up.
19) Sitting at the gate looking outside
Sit naturally with luggage beside you and look toward the runway. Profile angles look calm and thoughtful here. It’s a great “waiting moment” that feels real.
20) Plane framed through airport beams
Use the window structure, pillars, or beams to frame the aircraft like a picture frame. This adds geometry and makes the shot feel designed. It’s one of the easiest ways to upgrade a plain plane photo.
21) Glass reflection double shot
Capture your reflection in the glass while the runway scene stays visible behind it. This creates a layered, high-end look. Slightly angle the camera until reflections sit where you want them.
22) Sunlight across the face (soft side light)
Stand at a 45-degree angle to the window so light wraps your face softly. This looks editorial without heavy posing. Keep your eyes slightly off-camera for a natural feel.
23) Candid waiting moment
Shoot yourself reading, scrolling, adjusting headphones, or sipping coffee. The best “candid” shots are small actions, not forced randomness. Keep the background simple and avoid messy seats behind.
24) Gate number in the background
Position yourself so the gate sign is visible but not dominating the frame. It adds context and makes the photo feel like a real travel moment. Focus on you, let the sign support the story.
25) Gate sign close-up
Shoot the gate number crisp and clean, then include a blurred bit of you or luggage for context. This turns a basic sign into a storytelling photo. It’s perfect for posts, reels, and travel albums.
26) Passport + boarding pass flat-lay
Lay them on a clean surface with minimal extras like a pen or sunglasses. Hide sensitive details and keep the layout uncluttered. The simpler it is, the more premium it looks.
27) Time shot: watch or airport clock
Frame a watch/clock with the terminal or gate area behind it. This adds urgency and narrative, like “almost time.” Keep it sharp and avoid messy backgrounds.
28) Terminal map point shot
Point to your route or gate on the map for a simple “where next” moment. It’s a great in-between shot for storytelling. Keep your hand relaxed so it doesn’t look staged.
29) Hands holding coffee + passport
Hold both casually near good light, ideally by a window or clean corridor. This is a classic travel detail shot that still works when it’s clean. Don’t include too many items, or it looks cluttered.
30) Suitcase handle close-up with shallow background
Focus on the handle, your hand, and maybe a small detail like a tag or sticker. Let the terminal blur into soft shapes behind. This creates a stylish, minimal “travel texture” photo.
31) Tabletop travel flat-lay
Arrange coffee, headphones, notebook, and one key travel item in a neat layout. Keep negative space so it feels like a brand photo, not a mess. Shoot from directly above for the cleanest look.
32) Sitting by the window in a lounge chair
Sit relaxed with luggage close and light coming from the side. This gives a calm, premium “waiting well” vibe. Look out the window instead of at the camera for a natural mood.
33) “Working while traveling” shot
Open your laptop, place a drink nearby, and shoot from a slight angle. This makes you look productive, not posed. Keep the screen content neutral and avoid personal details.
34) Candid laugh shot
If you’re with someone, talk mid-shot and capture a real smile or reaction. The goal is “moment,” not “pose.” Background matters here, so choose a clean corner.
35) Backlit drink shot
Hold a coffee or drink against the window light so it glows slightly. It’s a simple detail that looks high-end when the background is minimal. Keep the cup sharp and the rest soft.
36) Plane tail lineup through glass
Capture multiple tails lined up to show repetition and scale. This works great from inside the terminal through big windows. It looks strong even without close-up aircraft details.
37) Rainy window plane shot
Use raindrops on the glass as texture while the plane sits blurred behind. It adds mood instantly and feels cinematic. Focus on the drops for a dramatic foreground.
38) Golden hour runway shot
Shoot when warm light hits the runway and planes for that “movie” color. Keep silhouettes or long shadows in frame if possible. This is where airports look their best with minimal editing.
39) Plane through reflections
Use glass panels to layer reflections of lights, signs, or people over the aircraft. It adds depth and makes the shot feel artistic, not touristy. Small angle changes make a huge difference here.
40) Tray table flat-lay
Arrange your snack, headphones, and a book neatly on the tray. Keep it minimal so it looks intentional. This is a clean “I’m officially flying” storytelling shot.
41) Wing shot with clouds
Frame the wing with a balanced horizon and clean clouds. It’s classic for a reason: it instantly communicates altitude and movement. Keep the window clean and avoid reflections when possible.
42) Window silhouette inside cabin
Turn toward the window so light outlines your face and shoulder. This feels quiet, reflective, and cinematic. Don’t force emotion, just keep it natural and still.
43) Night city lights from the window
Capture the city glow as dots and lines while keeping the frame steady. Night shots feel dramatic and travel-heavy. The key is a clean window and a simple composition without cabin clutter.
Composition Tricks That Make Airports Look Premium
If your airport photos look “busy,” it’s usually a composition issue, not a camera issue. Use these simple rules:
1) Find leading lines: Hallways, ceiling strips, railings, and tiles are free directional tools. Put your subject where the lines point.
2) Use symmetry (but don’t overdo it): One strong symmetrical shot is enough. Then switch to off-center framing.
3) Shoot wider than you think: Airports look expensive when you show space.
4) Look for clean backgrounds: Step two meters left or right. It changes everything.
5) Use reflections for depth: Glass and polished floors are built-in effects. Use them.
Editing Tips for Airport Photos (Simple and Effective)
You don’t need fancy editing. Airport photos look best when they’re clean, bright, and controlled.
- Reduce highlights (windows blow out fast)
- Lift shadows slightly (but don’t gray out the photo)
- Keep skin tones natural (avoid heavy orange)
- Add a little sharpness and clarity, lightly
- For night shots: lower exposure and keep contrast moderate
If you want one consistent style: neutral whites + soft contrast + clean colors.
FAQs: Airport Photo Ideas
Can you take photos inside an airport?
In most public terminal areas, yes. But rules vary by airport and country. Avoid security areas and use common sense.
How do I take airport photos without strangers in the background?
Shoot near gates with big windows, use wide angles, aim for silhouettes, and frame tighter on details.
What are the best airport photo ideas for Instagram?
Walking shots, window silhouettes, gate number shots, luggage detail close-ups, and café flat-lays usually perform well.
How do I make airport photos look cinematic?
Use window light, shoot reflections, include movement (walkways/escalators), and keep backgrounds uncluttered.
Final Thoughts
Airports aren’t just places you pass through. They’re ready-made sets: bold lines, huge windows, constant motion, and details that instantly tell a story. If you want better airport photos, stop hunting for complicated poses.
Pick a clean spot, use the architecture, and shoot small actions: walking, waiting, looking out, sipping coffee. Mix one wide “scene” shot with a few tight detail frames, and you’ll leave with a full travel narrative.
Keep it simple, stay respectful, and move fast. Your best shots will feel effortless, because they are. Next time you fly, use this list and capture the journey, not perfection.