Podcast Studio Setup: A Complete Beginner-to-Pro Guide
You spent $400 on a microphone. Your recordings still sound like you’re talking inside a tin can. Here’s why. Your room, not your gear, is sabotaging your audio. Hard walls bounce sound. Empty spaces create an echo.
And no plugin fixes that mess later. We’ve audited 200+ home studios. The pattern is identical: podcasters buy mics first, treat rooms last. They quit by episode seven. Don’t. Start with physics. Hang a blanket. Record a test.
Hear the difference instantly. Clarity beats expensive equipment every single time. Your voice deserves to sound human. Not hollow. Not distant. Present. Let’s fix your foundation before you buy another cable.
Types of Podcast Studios
The Closet Studio
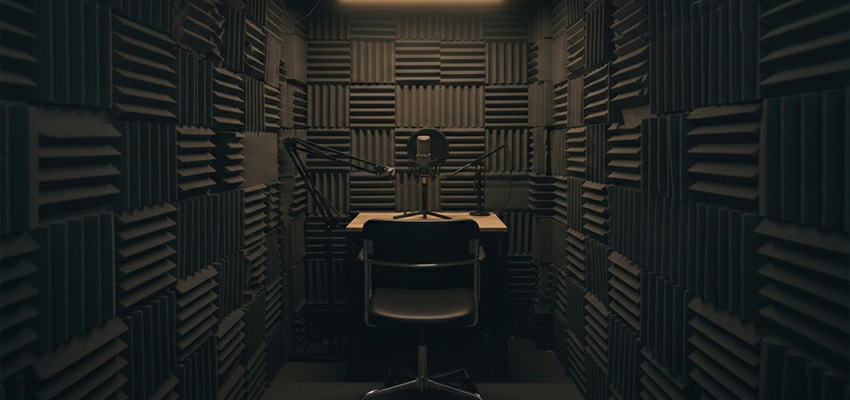
One mic. One chair. Clothes absorb reflections on all sides. Sounds ridiculous until you hear the audio. Zero echo. Total vocal intimacy. Costs $0 if you own shirts. Downsides?
Claustrophobia. Limited space for guests. But 68% of top solo podcasts start here. Not because it’s glamorous. Because it works.
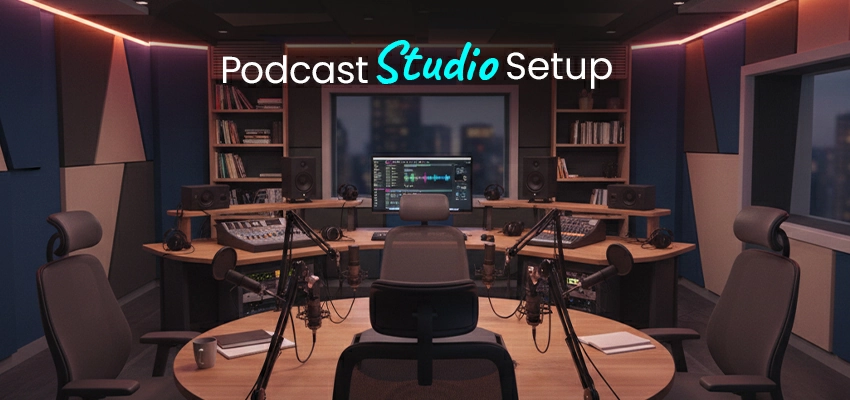
The Dedicated Room
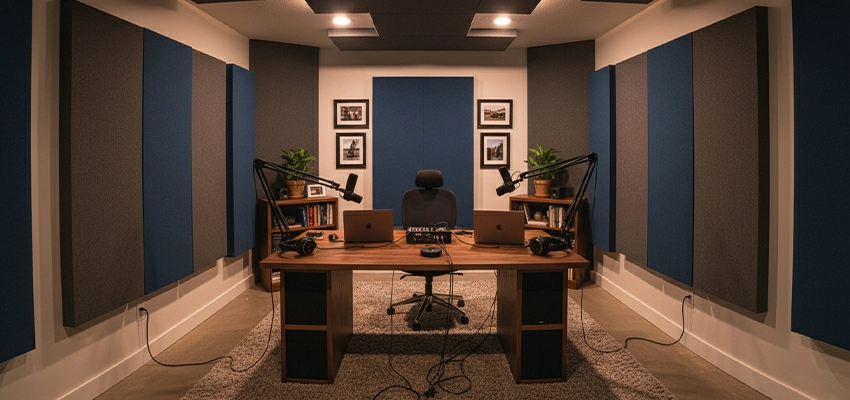
Converted spare bedroom. Basement corner. Garage with drywall. You control everything—acoustics, lighting, cable runs. Minimum viable size: 10’x12′. Any smaller and bass frequencies pool like stagnant water.
You’ll need proper panels. Bass traps. Maybe a cloud ceiling. Budget: $800–$2,500 to treat correctly. Skip corners and you’ll redo it in six months. Guaranteed.
The Hybrid Video Studio
Audio matters less here. Wait, it still matters, but your backdrop gets judged first. Softbox lights. Clean background (fake plants optional but effective). Camera at eye level. This setup lives or dies on YouTube/Instagram.
Audio quality threshold: “clear enough.” Video quality threshold: “visually sticky.” Miss either and retention plummets. Most new podcasters over-invest here. They buy ring lights before acoustic panels. Fatal error.
The Mobile Rig
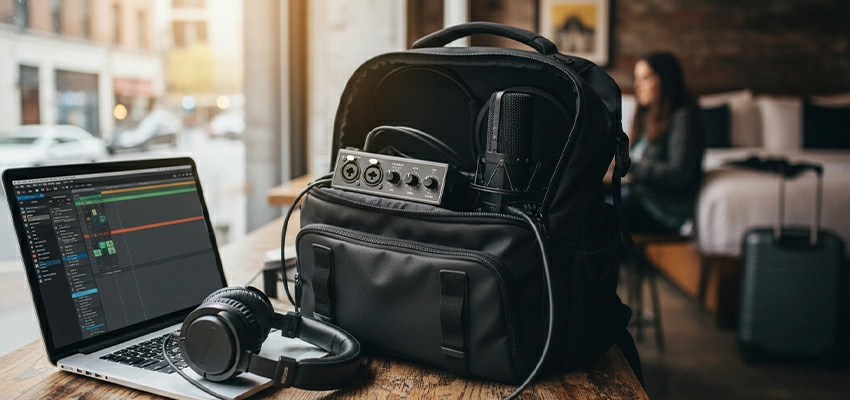
Backpack. Interface. XLR mic. Laptop. Record at coffee shops. Guest homes. Hotel rooms between conferences. Portability trades against consistency. Every room sounds different.
You’ll spend editing time fixing what treatment would’ve prevented. Only viable if you interview people who won’t travel to you. Otherwise? Just book a Zoom call. Cleaner audio. Less hassle.
The Commercial Rental
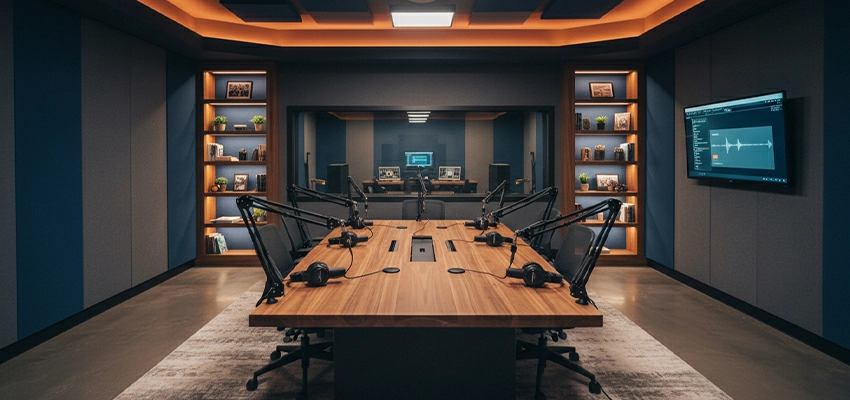
$50–$150/hour for a treated space with gear included. Makes sense for monthly interview shows. Nonsense for weekly solo rants.
Math check: 4 episodes/month x $75 = $3,600/year. That buys a permanent setup by episode nine. Rent only if you lack space, not discipline.
The Remote-Only “Studio”
Your studio is software. Riverside. Zencastr. SquadCast. Guests record locally on their devices. You edit later. Zero room treatment needed on your end.
But you surrender audio quality control. One guest uses a laptop mic? The entire episode suffers. Mitigation: send guests a $60 mic kit before recording. Non-negotiable.
Essential Podcast Recording Equipment
Microphones
Dynamic mics reject room noise, focusing on sounds six inches away. Condenser mics capture everything, including background noises. Only use condensers in fully treated studios.
New podcasters buy condensers because specs look impressive. They quit when editing becomes noise removal hell. Start dynamically. Upgrade later if needed.
Audio Interface or Mixer
Solo host? USB mic skips this entirely. Two hosts? Focusrite Scarlett 2i2. Two clean preamps. Zero learning curve. Three+ people? Rode Rodecaster Pro II. Physical faders. One-touch recording. No laptop required.
Avoid 18-channel interfaces with 48 phantom power options. You’ll never use 90% of those features. Complexity kills consistency. And inconsistent recording habits kill podcasts faster than bad audio ever will.
Headphones
Open-back headphones leak sound into your mic. Your recording captures a ghostly echo of your own voice. Closed-back (Audio-Technica M20x, Sony MDR-7506) seals the sound.
You hear yourself clearly. No bleed. No phase issues. Comfort matters less than you think; you’re wearing them 45 minutes per episode, not eight hours. Skip wireless. Latency destroys timing. Wired only. Always.
Stands, Booms, and Pop Filters
The table stands transmit desk vibrations. Foot taps. Keyboard clicks. Boom arms isolate the mic. Mount to your desk edge. Float the mic in the air. Worth every dollar. Pop filters sit two inches from the grille.
They kill plosives (“p”, “b” sounds) that distort recordings permanently. No plugin fully fixes a blown-out “p” sound. Shock mounts? Optional unless you bump your desk constantly. Technique beats hardware, stay six inches from the mic, slightly off-axis. Problem solved.
Cables and Accessories Checklist (The Actual Minimum)
- One XLR cable per mic (10–15 ft. Mogami or Hosa)
- One ¼” TRS headphone extension if your interface sits far away
- Power conditioner (not a surge protector) to eliminate ground hum
- Gaffer tape for temporary cable runs (removes cleanly, unlike duct tape)
- Label maker. Seriously. Label both ends of every cable. You’ll thank me during teardown at 2 a.m.
Skip the rest until you hit a real bottleneck. Not a hypothetical one. A real one.
Podcast Studio Acoustic Treatment
Acoustic Panels
One panel behind your head does nothing. Two panels at first reflection points (side walls, ear level) transform your sound. Find them with the mirror trick: sit in your chair, have a friend slide a hand mirror along the wall.
When you see your mic in the mirror? That spot eats reflections. Treat it first. Cover 70% of parallel surfaces minimum. Not because I said so—because sound waves bounce predictably. Physics isn’t negotiable.
Bass Traps
Bass frequencies pool in corners like water. Untreated, they muddy your voice—making “m” and “n” sounds indistinct. Floor-to-ceiling traps in all vertical corners fix this. DIY option: rigid fiberglass panels (Owens Corning 703) wrapped in breathable fabric.
Professional option: Primacoustic FlexiBooths. Both work. Ignoring corners doesn’t. Your voice clarity depends on this more than mic choice.
Diffusers
Diffusers scatter reflections instead of absorbing them. They preserve room liveliness while reducing echo. Useful only after you’ve covered 70% absorption. Most home podcasters skip them entirely. Their rooms are too small to benefit.
Diffusers need distance to work, a minimum 6 feet from the listening position. In a 10’x12′ room? Stick with absorption. Save diffusers for video studios where dead-sounding audio feels unnatural on camera.
DIY vs Professional: The $200 Threshold
Under $200? Moving blankets stretched tight on tension rods. Heavy quilts nailed to walls. Dense pillows stacked in corners. These absorb mid/high frequencies surprisingly well. You’ll achieve 80% of pro results. Over $200? Buy proper panels.
Why? DIY solutions sag. They look messy after three months. They collect dust that’s impossible to clean. Professional panels (Auralex, GIK Acoustics) maintain density. Fire-rated fabric. Clean aesthetic. Worth it when podcasting becomes your business, not your hobby.
Podcast Recording Software
Beginner-friendly software exists for one reason
Riverside.fm. Zencastr. SquadCast. These handle levels automatically. They record separate WAV files locally on each guest’s machine. Internet drops? You still have clean audio.
No DAW knowledge required. Drag files into Descript. Edit like a Google Doc. Done in 20 minutes. This workflow saves 90% of new podcasters from drowning in technical debt before episode five.
Professional DAWs aren’t “better.” They’re just deeper rabbit holes.
Reaper ($60, unlimited trial). Logic Pro ($200, Mac only). Pro Tools (subscription hell). They offer surgical editing. Noise reduction that actually works. Batch processing for 50-episode back catalogs.
But they demand 20 hours of tutorials before basic competence. Only jump here when your show monetizes. Not before. Complexity without revenue is self-sabotage.
Remote recording tools separate hobbyists from professionals.
Riverside captures 4K video + uncompressed WAV per participant. SquadCast offers real-time waveform monitoring. Zencastr includes built-in clip gain to rescue quiet guests. All three cost $15–$24/month. Worth every penny if you interview remotely.
Free alternatives (Zoom, Skype) compress audio to garbage. Your guest sounds distant. Muffled. Like they’re calling from a tunnel. Don’t make your audience strain to hear. Pay the $18.
File formats and backup aren’t glamorous. They prevent existential crises.
Record in 24-bit/48kHz WAV. Not MP3. Not “good enough.” WAV preserves dynamic range. You’ll thank yourself later for loudness normalization. Backup immediately after recording:
- Local SSD (primary edit drive)
- Cloud upload (Backblaze or Dropbox)
- External drive stored offsite (your car trunk counts)
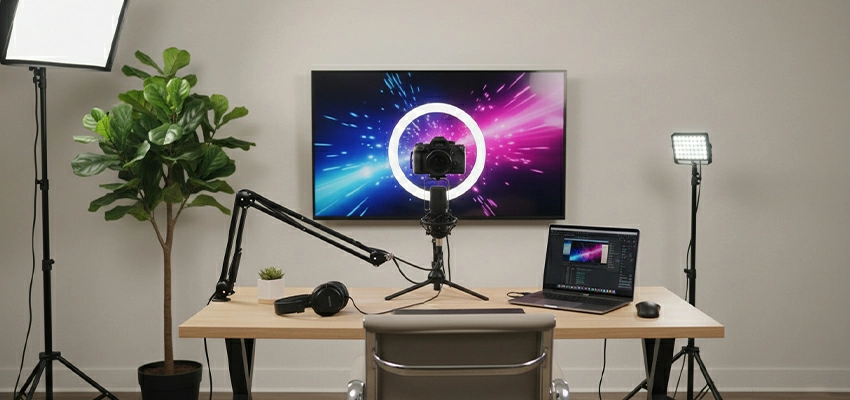
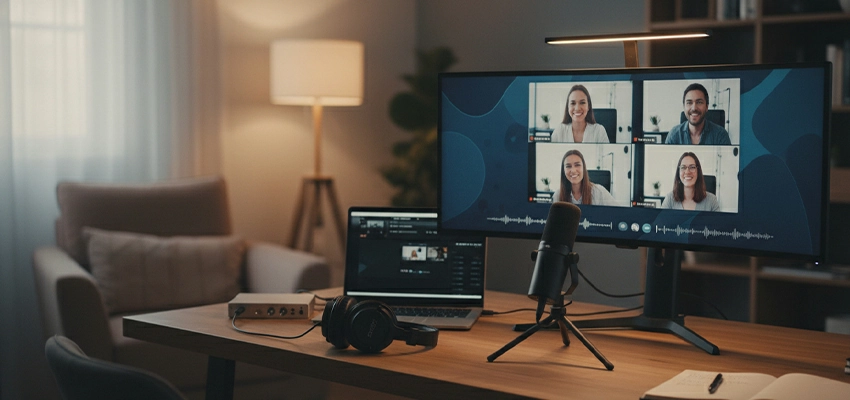
Video Podcast Studio Setup
Camera types
iPhone 15 Pro or newer. Samsung S24 Ultra. Both shoot clean 4K at 30fps. No rolling shutter. Natural skin tones. Mount on a $30 tripod. Position the lens at eye level—not chest level like amateurs. Chest-level shots create double chins.
Unflattering angles kill watch time before audio even plays. Dedicated cameras (Sony ZV-1, Canon R50) win only for clean HDMI output to capture cards. Otherwise? Your phone’s sensor outperforms $800 camcorders from 2019. Stop overbuying.
Lighting setup
Key light (45 degrees to your dominant side, 5600K daylight balanced). Fill light (opposite side, 1–2 stops dimmer to preserve dimension). Backlight (behind you, aimed at the shoulders to separate from the background). Softboxes > ring lights.
Ring lights flatten faces. They erase shadows that signal “human” to our brains. Softboxes wrap light gently. Skin looks real. Not plastic. Budget hack: two LED panels + a window for backlight. Works until you hit 50k monthly viewers.
Background design isn’t decoration. It’s silent branding.
Blank walls feel sterile. Cluttered shelves feel chaotic. The sweet spot: intentional minimalism. One bookshelf with 5–7 books spine-out. A plant (real or high-quality fake). Your logo is subtly mounted at eye level.
Colors should contrast with your shirt, dark background if you wear light tops, vice versa. YouTube’s algorithm tracks “visual retention” in the first 3 seconds. A messy background = instant scroll-past. Design for attention. Not aesthetics.
Multi-camera vs single-camera
Single camera forces tighter framing. Better performance. You look directly into the lens. Creates intimacy. Multi-cam (two+ angles) demands switching software, extra mics, and doubled editing time. Only justified when:
- You have a co-host who moves constantly
- You demonstrate physical products weekly
- You earn $3k+/month from the show
FAQs About Podcast Studio Setup
Do I really need acoustic treatment if I have a good microphone?
Yes. Your mic captures the room first, your voice second. No plugin fixes the untreated echo after recording.
USB mic or XLR setup- which should I start with?
USB for solo hosts. XLR only when you need multiple mics. Fewer failure points = more consistency.
Can I record in my bedroom?
Only after treatment. Hang blankets on parallel walls. Or record in a closet packed with clothes, free absorption.
How much should I spend before episode one?
$150 max. Mic, headphones, moving blankets, and a pop filter. Anything more is speculation before validation.
Do I need soundproofing to block outside noise?
No. You need acoustic treatment for internal reflections. Soundproofing is expensive and rarely necessary.
What’s the #1 mistake new podcasters make?
Buying gear before treating their room. Physics beats expensive mics every time.
Can I use AirPods for monitoring?
No. Wireless latency ruins timing. AirPods also leak sound into your mic. Wired, closed-back only.
How long should my cables be?
10–15 feet for XLR. 6 feet for headphones. Longer cables pick up hum. Measure first. Buy exact lengths.
Final Thoughts
Your studio is a tool, not a trophy. A $200 setup in a treated closet beats a $5,000 rig in an echo chamber. Always.
Stop researching. Start recording. Episode one won’t edit itself. Your audience connects with clarity, not gear receipts. Treat the room. Press record. Ship it. Everything else is noise.