May 15, 2021

Photoshop has been the ultimate editing tool since 1988 and it is here to stay! It is the go-to tool for any IT professional and you can do anything from photo editing to graphic designing or animation. Hence it is essential that you learn Photoshopping or hone your already existing Photoshop skills before you dive into the IT sector or photography. 9 Best YouTube Channels To Learn Photoshop You can learn Photoshop from many places but one of the most prominent platforms that offer easy learning opportunities is YouTube. There are many Photoshop tutorials on YouTube in a variety of
March 22, 2021

To focus proper attention on a photo, blurring edges can be a better method to be implemented. The process goes with blending it to white or transparent. In this article, we have come with two different ways (masking and selection) on how to blur edges in Photoshop so that you find the best solution with less effort and complexity. How to Blur Edges in Photoshop (Masking Method) Step-1 After opening the image in Adobe Photoshop, do unlock the layer by clicking the padlock symbol. Step-2 From the properties menu, go to Quick Actions>Remove Background. Step-3 Now, from the
December 25, 2020

You may need to edit model photos in Photoshop for different purposes, especially for promoting any particular product or service for an ecommerce business. And retouching the skin of the model is the most essential part. But many of you have a lot of problems regarding skin retouching. So, today, we are going to enclose a comprehensive guideline on how to retouch and beautify skin in Photoshop. Keep your eyes on the steps mentioned below to learn the process easily. How To Retouch Skin in Photoshop (Step by Step) To retouch the skin of a person in the image, you
November 22, 2017
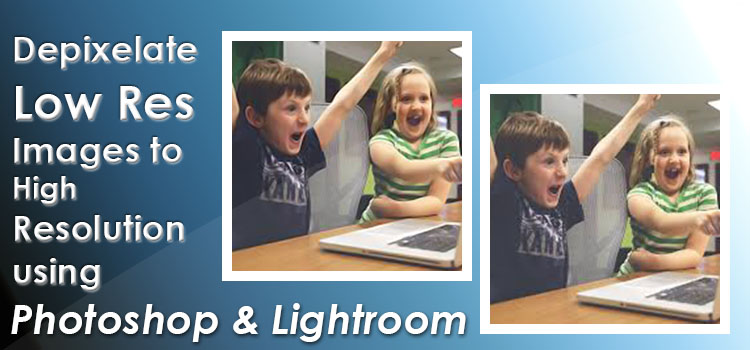
Due to various reasons your great photos may get pixilated that reduces the quality of your photos. You cannot use these images for any important purposes- whether it is personal or commercial. If it happens to you, don’t worry, you can get rejuvenate your photo into high resolution photos using different image editing tools like: Adobe Photoshop, Adobe Lightroom or Photoshop & Lightroom combined. Here, in this content we are going to share several step by step techniques on how to depixelate photos DIY. There is a warning tough. When you have a pixilated images with very low resolution, it
December 14, 2015

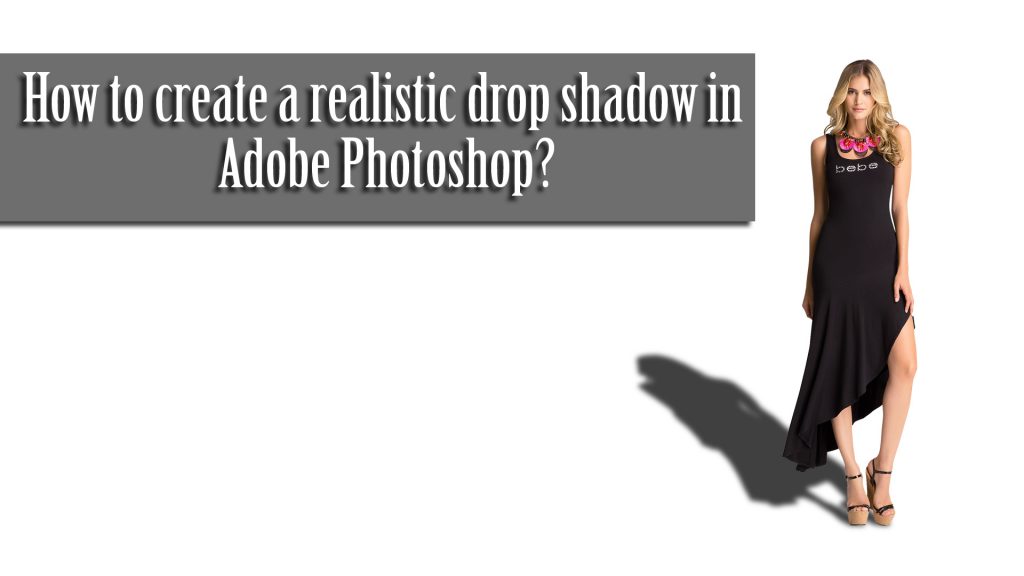
Most of the beginner graphic designers try to make/ add a reflection shadow in Photoshop to look a more realistic image. We present a realistic natural shadow tutorial for every Photoshop leaner. So let’s start In this Photoshop graphics design tutorial we will give you step by step actual/easy instruction and tips on “How to create a realistic mirror shadow in Photoshop” using the Photoshop software platform. Now at first open Adobe Photoshop Software, at that time select/import your existing image wish to for this task. After that remove the background around the image before you do the drop shadow when
January 19, 2013

I open Adobe Photoshop in my computer. Create a new document and set its size as width 600 x height 450 pixels. Set color mode in RGB. Where set resolution must be at 72 DPI. Go to Layer then Duplicate Layer and press OK. Follow this step duplicate the background. Save this new layer as your wish, I save it with the name of ‘Background Pattern’. To change the several textures, double click on previous layer named as Background Pattern. By go to ‘Pattern Overlay’ select the ‘Cherry01′ and press OK. Double click on ‘Background Pattern’ to create the vignette
January 17, 2013

To create a Photoshop image we have to open to make an image. So open the Adobe Photoshop. Create a document size with 1200 x 600 and save it as a .PSD file. It will be in RGB mode and 72 Dpi. Open a brick wall texture in the Photoshop. Through transform (Ctrl+T) change the texture and resize as you want. Make it darker by go to levels > Image > Adjustments > Levels or Command/Ctrl+L. The figure is: Make the text with the font “Impact”. Character set by 320pt, (Auto), 80% and 150%. And layer Opacity – 100% with
January 9, 2013

In this article I will describe how to draw two faces by Digital Painting. It’s just a simple article. The description is given below. At first open the Adobe Photoshop and open a new file. For open a new file go to File – New from the Menu bar. Now we have to decide the dimension of the canvas in which you feel comfort. This will be better if w choose a standard paper size. Intended for this image within scrupulous, approximately 9 inches with 12 inches would be sufficient. For the suitable image printing purposes always have to remember that