How to Create a Grid in Photoshop: A Step-by-Step Guide for Designers
Grids are the backbone of sharp designs. They’re behind that sleek website and the magazine spread that caught your eye. Why? Because grids bring balance. They create rhythm. They give your eyes a place to rest instead of bouncing around in visual chaos. In short: no grid = guesswork.
Now, if you’ve ever tried to wing it in Photoshop without a grid… yeah, it shows. Maybe you’ve dragged out guides by hand, only to realize halfway through that your columns are off by a few pixels. Or worse, you didn’t even know Photoshop could auto-generate a grid for you.
Here’s the good part: setting up a clean, custom grid in Photoshop is simple. You have options: quick built-in tools, smart guide layouts, or drawing your own for total control.
In this post, we’ll navigate through all three options. Select what suits your workflow and patience best.
Method 1: Use Photoshop’s Built-in Grid (It’s Already There)
You don’t need plugins, scripts, or a degree in geometry to get a grid going. Photoshop’s had one hiding in plain sight this whole time.
Step 1: Flip the Grid On
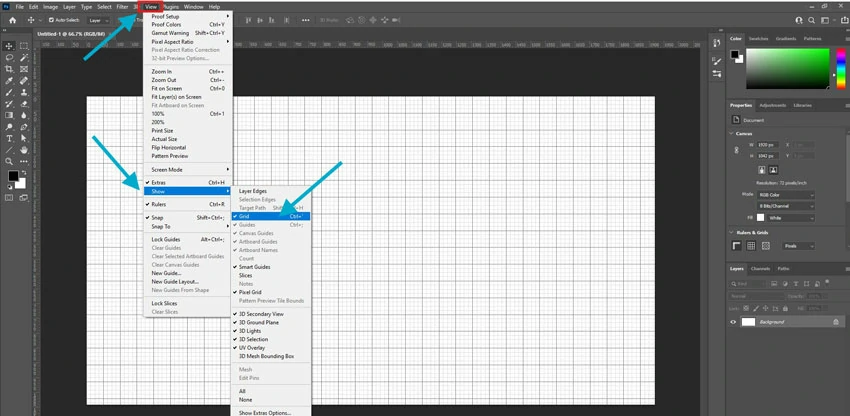
Go to View > Show > Grid.
In an instant, a light grid dances onto your canvas. Well! It’s not part of your masterpiece; it’s a guiding companion, much like graph paper beneath your sketch.
Step 2: Make it Work for your Project
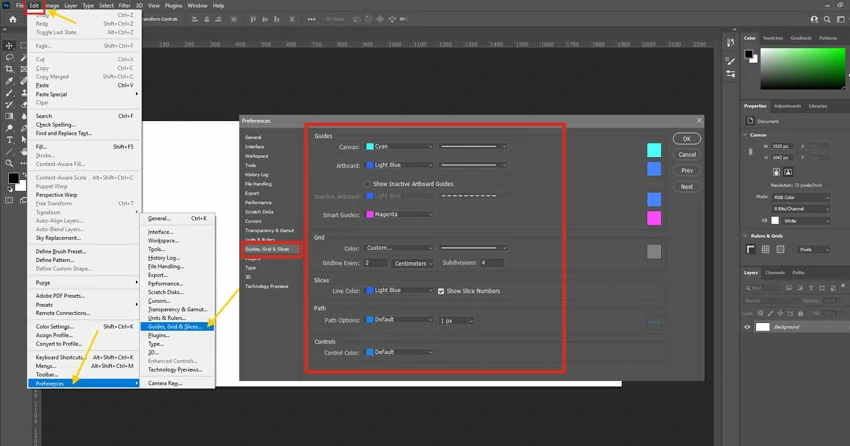
The default grid might be too wide, too tight, or just… off. Fix it by going to:
– Edit > Preferences > Guides, Grid & Slices (Windows)
– Photoshop > Preferences > Guides, Grid & Slices (Mac)
Then tweak:
– Gridline every: Try 50 px for web, 1 inch for print
– Subdivisions: Set to 5 if you want finer ticks between lines
– Color & Style: Switch to light gray dots if lines feel too harsh
Step 3: Let your Layers Snap into Place (optional but smart)
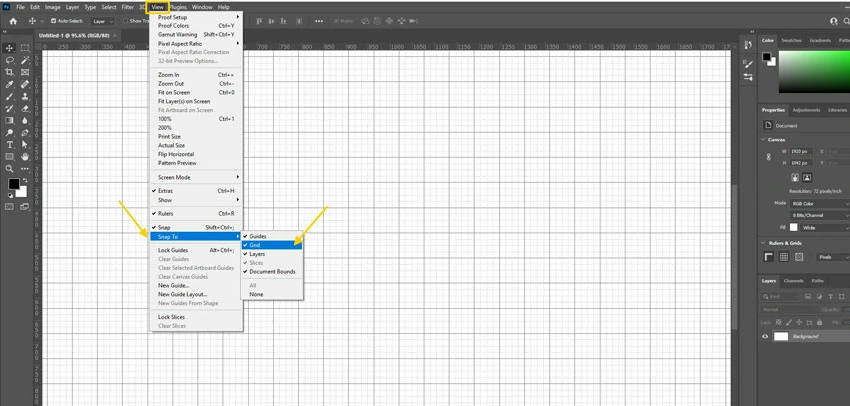
Turn on View > Snap To > Grid to make anything you move – text, shapes, images – lock gently into alignment.
Method 2: Build a Custom Grid Using Guides
Guides are different from the built-in grid. They sit directly on your canvas and stay locked in place. Plus, you can save them with your file. Here’s how to set one up easily:
Step 1: Bring Out the Rulers
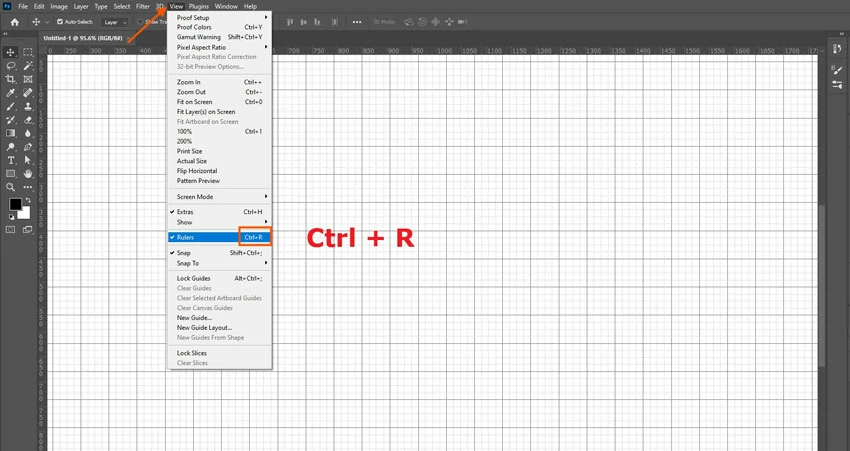
To unveil your rulers, simply press Ctrl + R (Windows) or Cmd + R (Mac). These guides, gracefully perched at the top and left, are your launchpads for creativity.
Step 2: Skip the Manual Dragging—Use “New Guide Layout”
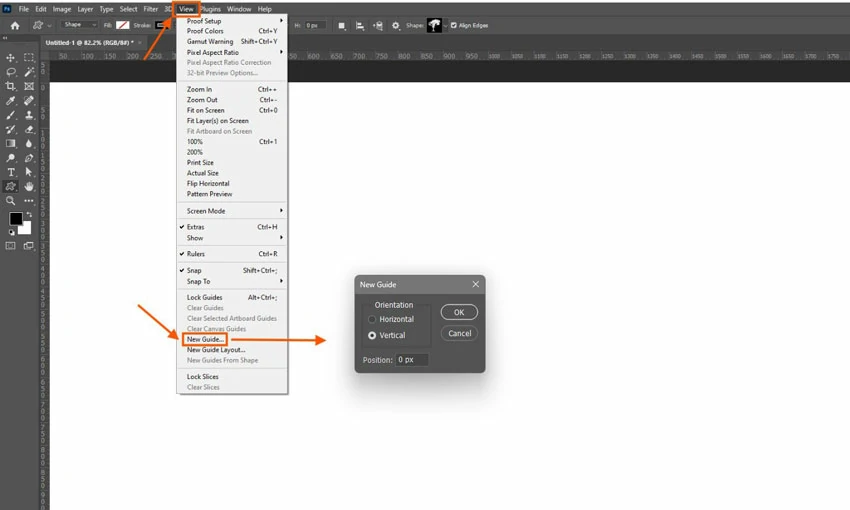
Sure, you could drag out 12 vertical lines one by one… or you could do it in 10 seconds.
Go to View > Guides > New Guide Layout.
Now, tell Photoshop exactly what you need:
- Columns: How many? (e.g., 3 for a classic blog layout)
- Gutters: Space between columns (e.g., 20 px)
- Margins: Breathing room on all sides (e.g., 40 px)
- Want rows too? Add them for full control (great for photo grids or dashboards)
Step 3: Lock it Down (So you Don’t Accidentally Move It)
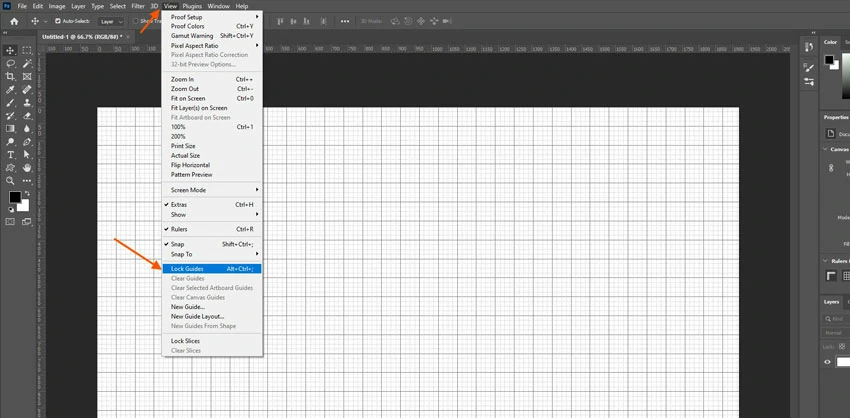
Right-click anywhere on the canvas and choose Lock Guides. Now your grid stays put while you design over it.
Method 3: Draw Your Own Grid (When You Want Full Control)
Sometimes the built-in grid feels too generic. Guides are great, but what if you want your grid as part of the design, maybe to export it, print it, or overlay it on a mockup? Here’s how to do it without losing your mind over alignment:
Step 1: Start Fresh on a New Layer
Craft a fresh layer, perhaps calling it “Grid” or “Layout Lines.” This clever separation allows you to toggle visibility at will, adjust opacity like a pro, or even bid it farewell without jeopardizing your masterpiece. Your design remains safe while you explore creativity!
Step 2: Pick your Weapon (Line Tool or Shape Tool)
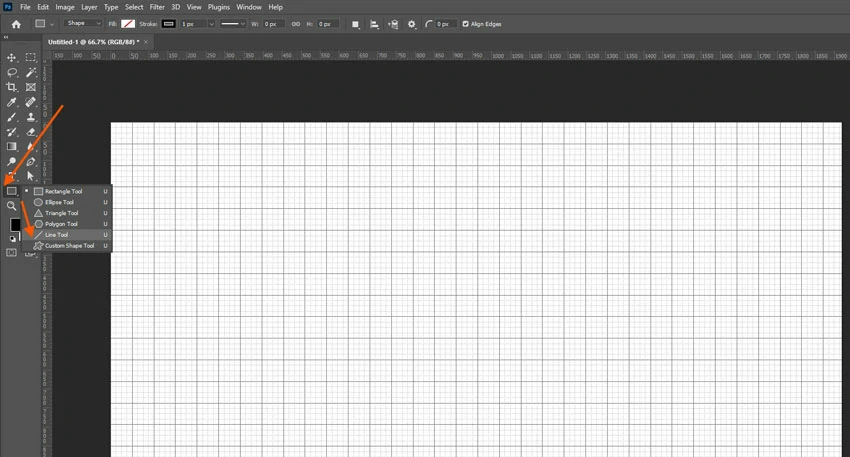
– Line Tool (hidden under the Rectangle Tool): Great for thin, precise strokes.
– Rectangle Tool: Better if you want solid grid cells (like graph paper).
Set your stroke color (light gray works well) and stroke weight (1–2 px is usually enough). No fill, unless you’re going for a blocky look.
Step 3: Draw One Line, then Multiply it Smartly

Start with a bold vertical line to mark your first column. Next, hold Alt (Windows) / Option (Mac) and effortlessly drag to duplicate.
To repeat that action with finesse, use Ctrl+J > Ctrl+T > Ctrl+ALT+Shift+T, the secret to uniformly spaced lines.
Pro tip: Activate View > Snap and View > Show > Grid (just temporarily!) for perfect alignment. Alternatively, try Layer > Distribute if you’ve selected multiple lines for seamless spacing.
Cheat Sheet: Keyboard Shortcuts for Grids & Guides (Print It. Save Time.)
Keep these handy—they’ll shave seconds off every project. And in design, seconds add up fast.
– Show/Hide Rulers
`Ctrl + R` (Windows) | `Cmd + R` (Mac)
– Show/Hide Photoshop’s Built-in Grid
`Ctrl + ‘` (apostrophe) | `Cmd + ‘` (Mac)
(That’s the key next to Enter—yes, really.)
– Snap to Grid
Enable via View > Snap To > Grid
(No direct shortcut, but once on, elements auto-align as you drag.)
– Lock/Unlock All Guides
`Ctrl + Alt + ;` (Windows) | `Cmd + Option + ;` (Mac)
(Semicolon key—great for preventing accidental drags.)
– Clear All Guides
Layout > Clear Guides
(No default shortcut, but you can assign one in *Edit > Keyboard Shortcuts** if you use it often.)*
– New Guide Layout (the smart way)
Layout > New Guide Layout
(Worth clicking—saves 10+ manual drags.)
– Toggle Smart Guides (dynamic alignment hints)
`Ctrl + U` (Windows) | `Cmd + U` (Mac)
(Not the same as grids—but super helpful when snapping to edges or centers.)
Bonus Tips & Tricks (Because Real Designers Cheat—Wisely)
You’ve got your grid. Now let’s make it work harder for you—without extra effort. Here, some pro tips from professional designers:
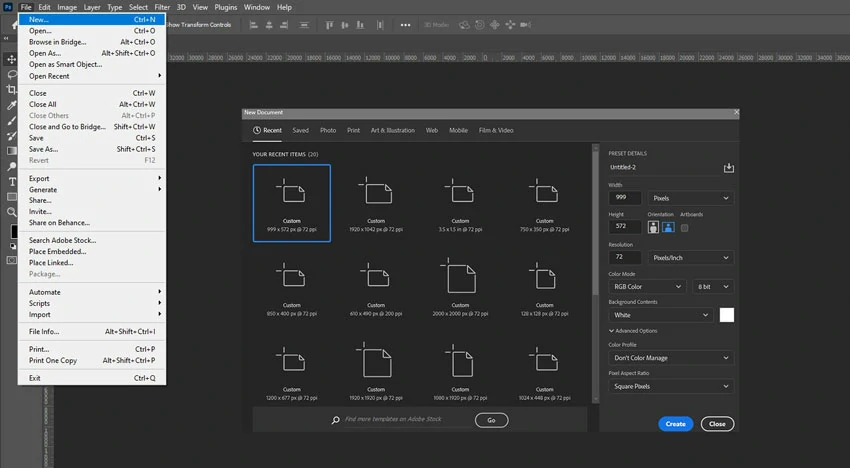
1. Save it as a template
Spent time perfecting a 12-column web grid? Don’t rebuild it next time. Just save your file as a PSD template (File > Save As > Photoshop Template). Next project? Open it, and your grid’s ready to go—zero setup.
2. Toggle visibility in a flash
To unveil or conceal the built-in grid, simply press Ctrl + ’ on Windows or Cmd + ’ on Mac. For guide-based grids, a quick click on the eye icon beside your “Guides” layer will do the trick. If you’ve converted them, just lock or unlock as desired.
3. Turn guides into actual lines (when you need to)
Guides don’t export—but sometimes you want the grid visible in a client PDF or style guide. Go to View > New Guide Layout, set it up, then use File > Scripts > Guides to Vector Mask (or manually trace with the Line Tool). Now it’s part of your artwork.
4. Mix grids with design rules
Want to make your designs feel more balanced and interesting? Try the Rule of Thirds. If you want something more sophisticated, like a magazine spread or luxury brand mockup, use the Golden Ratio (about 1:1.618).
5. Keep it non-destructive
Always put drawn grids on their own layer. Lower the opacity to 20–30% so it guides without distracting. And group it with a “Layout” folder—your future self will thank you.
To Wrap It Up
Grids aren’t about rules or repetition; they’re about freedom. Provide a structured layout, and you can save time on spacing and focus on being creative.
– The built-in grid for quick visual reference,
– Smart guides for pixel-perfect layouts that stick with your file,
– Or a hand-drawn grid when you need total control (or want to show the grid itself).
Select the method that best fits your project, rather than the one that sounds “most professional”. A 10-second guide layout might be a smarter choice than a hand-crafted vector grid in some cases. In others, you’ll need to lock down every line.


