Focus Stacking with Auto-blend for Macro Photography in Photoshop and Lightroom

If you are a macro photographer, you probably have heard the very words ‘focus stacking’ and ‘auto-blend’. This tutorial is dedicated to dedicated macro Photographers.
But for more, focus stacking is a method to combine some frames shot at many focal points. This idea is to have all the unfocused points in your image focused and it is required in the case of macro photography where there is shallow depth of field. It may happen during ecommerce photos of small product photography where it is challenging to capture high-range images with detailed information about the products.
And when you pick small subjects of nature, you will not get the desired focus. It is almost impossible to capture a small image fully focused in a single shot. The photographers have to take images focusing on different parts and auto-blend them in Photoshop. If the images demand light correction, they also do the job in Lightroom.
Before starting focus stacking and image blending, you should have some proper shot images. What we want to mean is that you need more than one image shot from various focal points. To take the images of any tiny product, the photographers have to maintain some techniques.
Photography Techniques For Focus Stacking Images
For properly stacking and image blending, primarily images have to be shot well. Product images need macro photography techniques and tools. However, here are some suggestions that help to take suitable images for stacking.
1. You have to apply good lighting effects to have a clear focal point.
2. Make sure the lighting and shadows are stable. Otherwise, different lights and shadows can differ the quality of your final image.
3. Your stack image framing should be consistent. So, try to use a suitable tripod to avoid shake or something like this.
4. You have to use a focus stacking macro photography rail slider that will give you the advantage of moving your macro camera on any side close to the subject.
5. You should use some forms or shutter releases so that you need not require to hit the button manually. You can use Pocket Wizard or something like this.
6. You should use manual focus so you have full control. If it is autofocus, it would override because it tries to correct what you’re doing.
7. Firstly, choose stacking point, and then adjust & shoot.
8. One good tip is: You can use your existing lens for macro photography with a reverse lens ring.
If you can maintain all these steps, your images will be worthy for stacking and blending in Photoshop and Lightroom.
For the sake of this tutorial, we have used the below product images to combine them together.

Look at the images, there are different focused points in every image because at one shot it is not possible to focus on every part of this type of small product image. Ok, now let’s see the step by step focus tacking process-
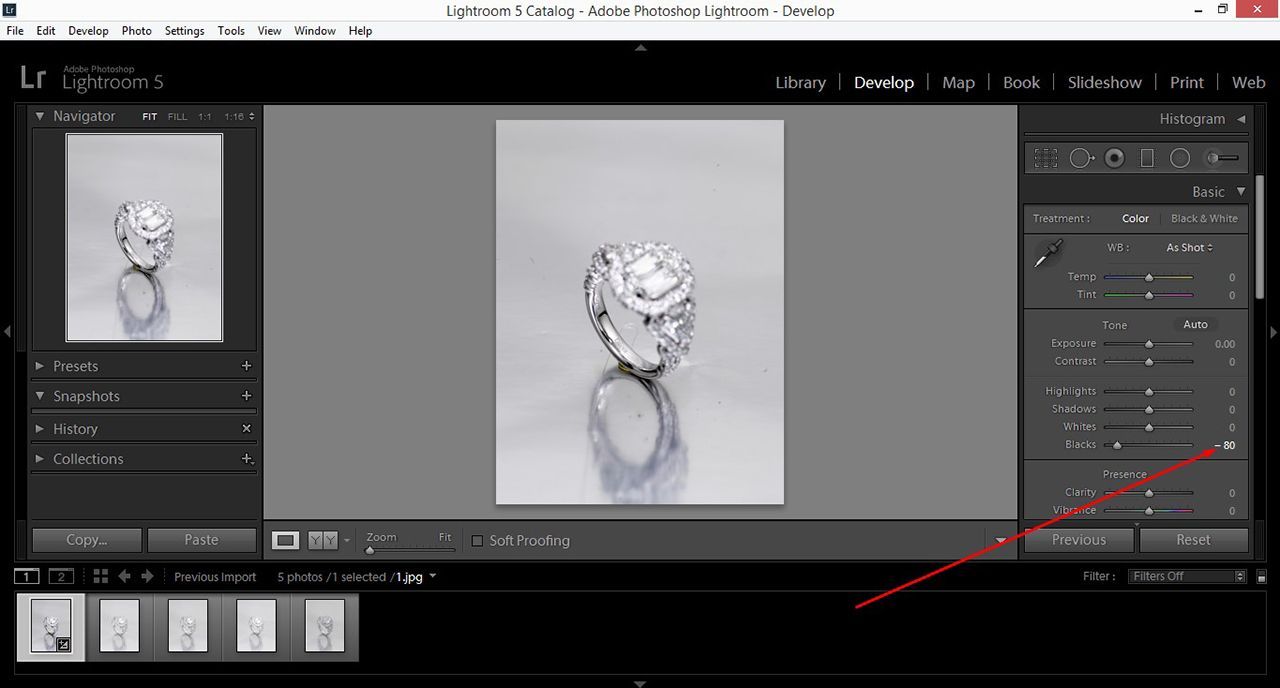
1. At the very first step, we import all the above images in Lightroom and reduce the Blacks level up to -80 in all images to less the white overexposure color. We do the job individually opening every image. If your image demands more different retouching, you can do it here.
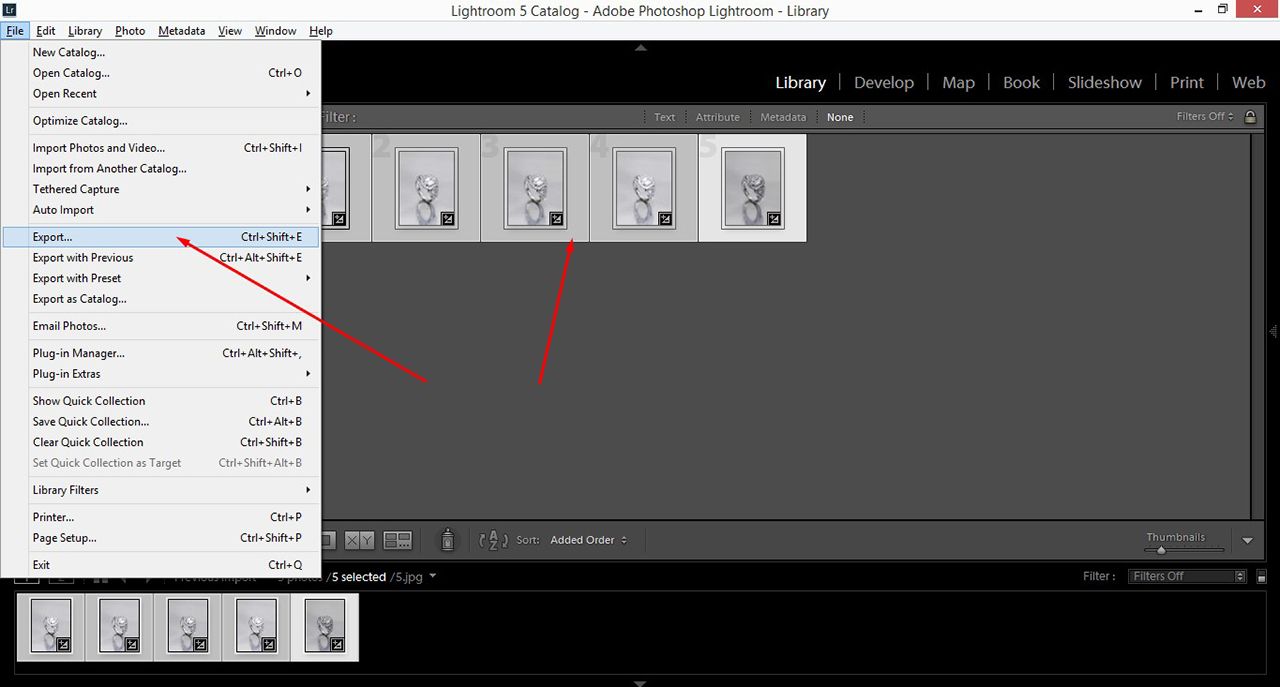
2.Then, we select all the photos and from File, go to Export to save all the images as JPG files.
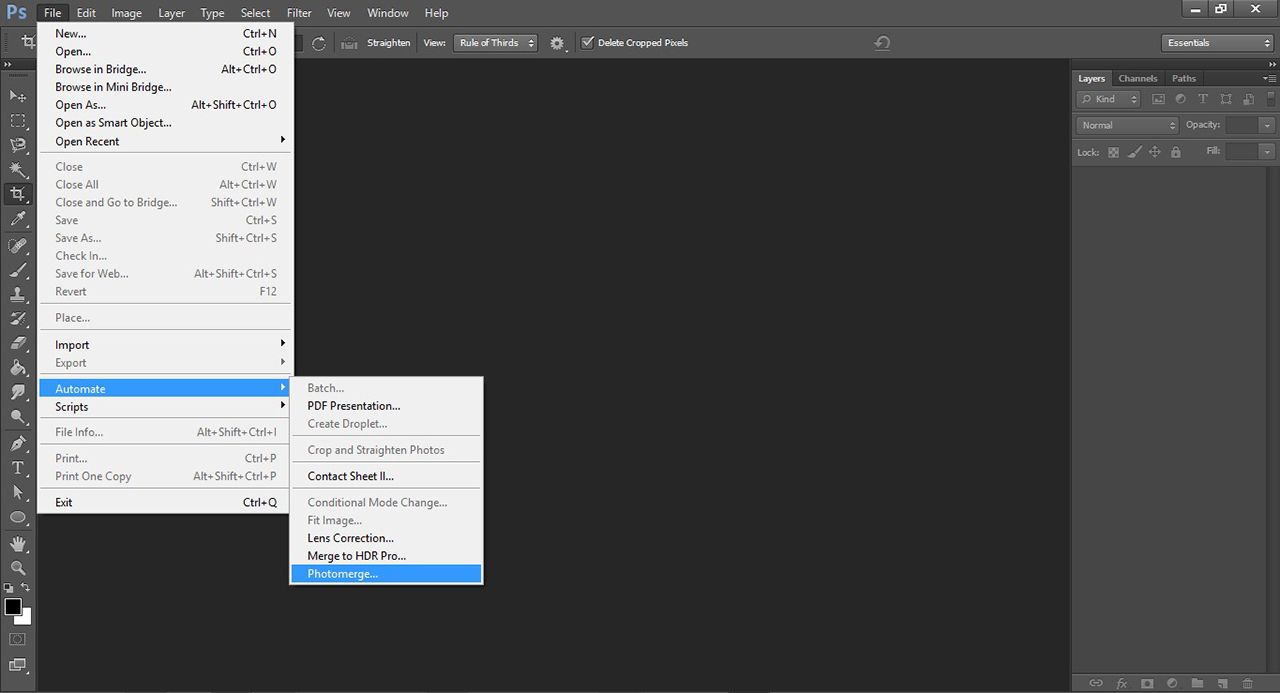
3. In this stage, it is time for Photoshopping. Firstly, open all the images in Photoshop. Go to File > Automate > Photomerge. Here you will get a dialog box.
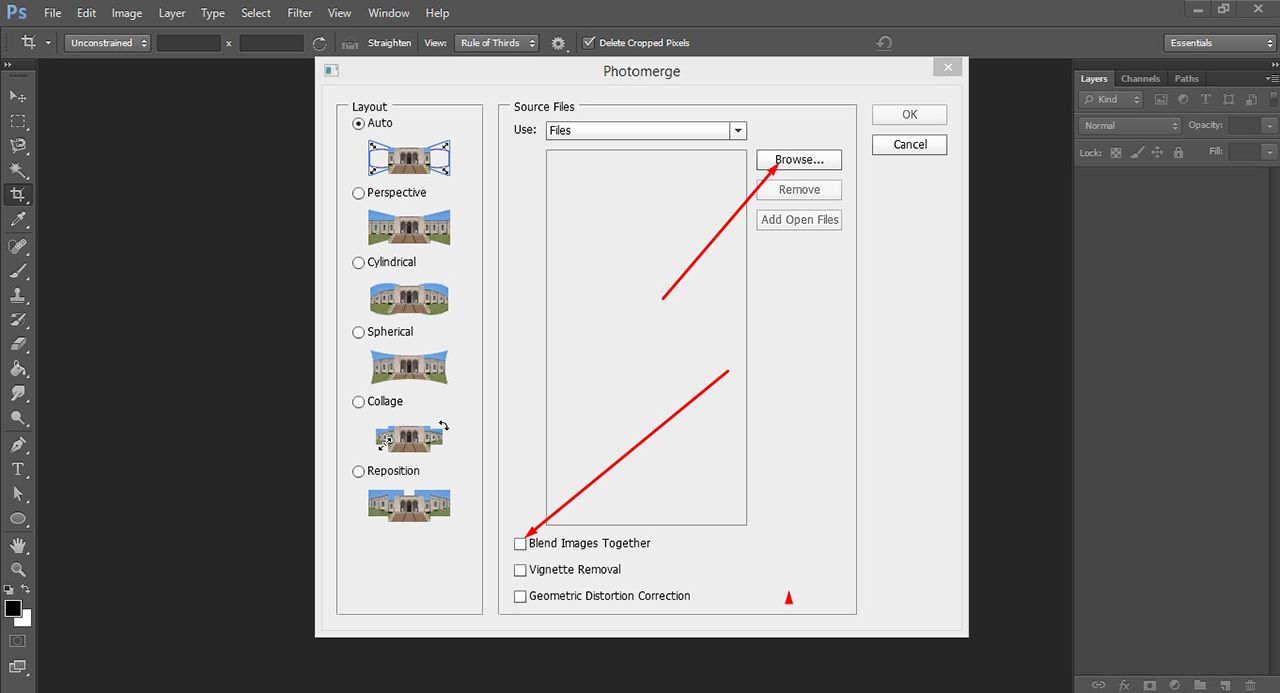
4. From the box, click on Browse to select the images. Ensure the check box is empty at the bottom. See the image below.
5. Select all the images together and press Ok. Wait a bit. All of your images will be aligned in the Layer palette. Look at the snapshot below for a better understanding.

6. Select all the layers. You can select the images individually or press Shift and click on the last layer to select all in one click.

7. Go to Edit from the top and click on Auto-Blend Layers. You will get another box. From this new window, select the Stack Images instead of Panorama and then click Ok.

8. From this new window, select the Stack Images instead of Panorama and then click Ok.

9. You have to wait here a few seconds and everything is good, you will have such an image with full focus. See the image below, all the layers are masked. This automated tool has taken the properly focused portions from all the images and blended together which results in high quality full focused product image.

10. Anyway, it is all about focus stacking and auto-blending. But if you want a more lucrative image, you can retouch your image more. What result we have got is attached below. Look at the image, we have removed the background to place white another. We again open it in Lightroom and do more retouching as our product image required. Zoom the image, you will get a properly focused image.

Focus Stacking in GIMP
Focus stacking using GIMP is pretty much more complex than that in Photoshop. The task here is manual and demands the skill and experience of the designers whereas focus stacking and photo blending in Photoshop is completely automatic.
For focus stacking in GIMP, firstly, you have to open your all images in the same layer. Mark your non-focused area by guides. Clicking the right button on the first layer, Select Marge from the dropdown. Then, go to layer and add a layer mask (Layer > Mask > Add Layer mask). Select the brush tool and drag on the blurry area and it will clear the area. Next, go to Image from the top and click on the Guides & remove guides. Finally, flatten the image and save it.
This manual technique sounds easy, but still, it is more complex and a designer should have the proper knowledge about layer masking, guides, merge images, etc. Even, though sometimes it cannot produce a fully focused image like Photoshop it is unparalleled so far considering focus stacking and image auto-blending.